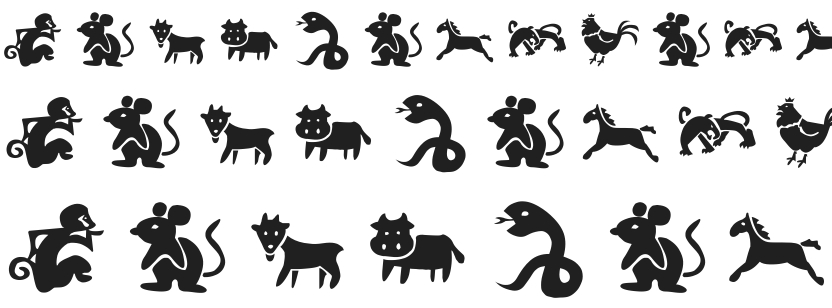
 ※ 可爱的 12 生肖
小时候总喜欢围坐在老爷爷老奶奶旁边,让自己的思维随着耳边流动的故事飘走,而这些有趣的故事之中,最喜欢的莫过于那些神奇的神话传说,关于鬼、神、以及天。其中,十二生肖应该是多数人的美好童年回忆,现在就让我们在自己的博客加上这些元素以延续那些美好回忆!
#灵感来源
正如页脚跳动的小红心的灵感来源是 DIYgod,十二生肖的灵感来源也是一个博客——Forsigner。
#操作步骤
1)下载字体:chinese-zodiac.zip (23.2KB),下载后将解压的三个字体文件全部放在 ~/blog/source/fonts/ 下(若无 fonts 文件夹请自建)。
2)新建文件:保存到下面的目录,文件名为 chinese-zodiac.swig。
<!-- 文件位置:~/blog/themes/next/layout/_partials/chinese-zodiac.swig -->

{% if year % 12 == 0 %}
<i class="symbolic-animals icon-monkey"></i>
{% endif %}
{% if year % 12 == 1 %}
<i class="symbolic-animals icon-rooster"></i>
{% endif %}
{% if year % 12 == 2 %}
<i class="symbolic-animals icon-dog"></i>
{% endif %}
{% if year % 12 == 3 %}
<i class="symbolic-animals icon-pig"></i>
{% endif %}
{% if year % 12 == 4 %}
<i class="symbolic-animals icon-rat"></i>
{% endif %}
{% if year % 12 == 5 %}
<i class="symbolic-animals icon-ox"></i>
{% endif %}
{% if year % 12 == 6 %}
<i class="symbolic-animals icon-tiger"></i>
{% endif %}
{% if year % 12 == 7 %}
<i class="symbolic-animals icon-rabbit"></i>
{% endif %}
{% if year % 12 == 8 %}
<i class="symbolic-animals icon-dragon"></i>
{% endif %}
{% if year % 12 == 9 %}
<i class="symbolic-animals icon-snake"></i>
{% endif %}
{% if year % 12 == 10 %}
<i class="symbolic-animals icon-horse"></i>
{% endif %}
{% if year % 12 == 11 %}
<i class="symbolic-animals icon-goat"></i>
{% endif %}
3)修改文件:编辑 archive.swig 文件,删除红色一行,增加几行(复制粘贴后删除每行前面的 + 号)。
<!-- 文件位置:~/blog/themes/next/layout/archive.swig -->

          <div class="collection-title">
-            <{% if theme.seo %}h2{% else %}h1{% endif %} class="archive-year" id="archive-year-{{ year }}">{{ year }}</{% if theme.seo %}h2{% else %}h1{% endif %}>
+            <{% if theme.seo %}h2{% else %}h1{% endif %} class="archive-year" id="archive-year-{{ year }}">
+              {{ year }}
+              <div class="chinese-zodiac">
+                {% include '_partials/chinese-zodiac.swig' %}
+              </div>
+            </{% if theme.seo %}h2{% else %}h1{% endif %}>
          </div>
4)添加样式:将下面的 CSS 代码加入到 custom.styl。
/* 文件位置:~/blog/themes/next/source/css/_custom/custom.styl */

.chinese-zodiac {
    float: right;
}
@font-face {
  font-family: 'chinese-zodiac';
  font-display: swap;
  src: url('/fonts/chinese-zodiac.eot');
  src: url('/fonts/chinese-zodiac.eot') format('embedded-opentype'),
       url('/fonts/chinese-zodiac.woff2') format('woff2'),
       url('/fonts/chinese-zodiac.woff') format('woff');
  font-weight: normal;
  font-style: normal;
}
.symbolic-animals {
  display: inline-block;
  font: normal normal normal 14px/1 chinese-zodiac;
  font-size: inherit;
  text-rendering: auto;
  -webkit-font-smoothing: antialiased;
  -moz-osx-font-smoothing: grayscale;
}
.icon-dragon:before { content: '\e806'; }
.icon-tiger:before { content: '\e809'; }
.icon-pig:before { content: '\e810'; }
.icon-horse:before { content: '\e813'; }
.icon-rat:before { content: '\e816'; }
.icon-goat:before { content: '\e818'; }
.icon-snake:before { content: '\e820'; }
.icon-ox:before { content: '\e822'; }
.icon-dog:before { content: '\e825'; }
.icon-rabbit:before { content: '\e826'; }
.icon-monkey:before { content: '\e829'; }
.icon-rooster:before { content: '\e82f'; }
5)更进一步:经过上面的四步已经 OK 了,但你可能会发现单个分类页面和单个标签页面的时间轴没有效果,这是因为 NexT 主题不在这些页面添加年份分割,要想修改请参考我的另一篇文章 5.5 节。
#相关说明
1)chinese-zodiac.zip
字体来自 Hexo 主题 Fexo 的 fontello.ttf[1] 文件,我自己在 Linux 上用跑在虚拟机 XP 系统里的 FontCreator 修改了一下,字体版权归原作者所有[2]。
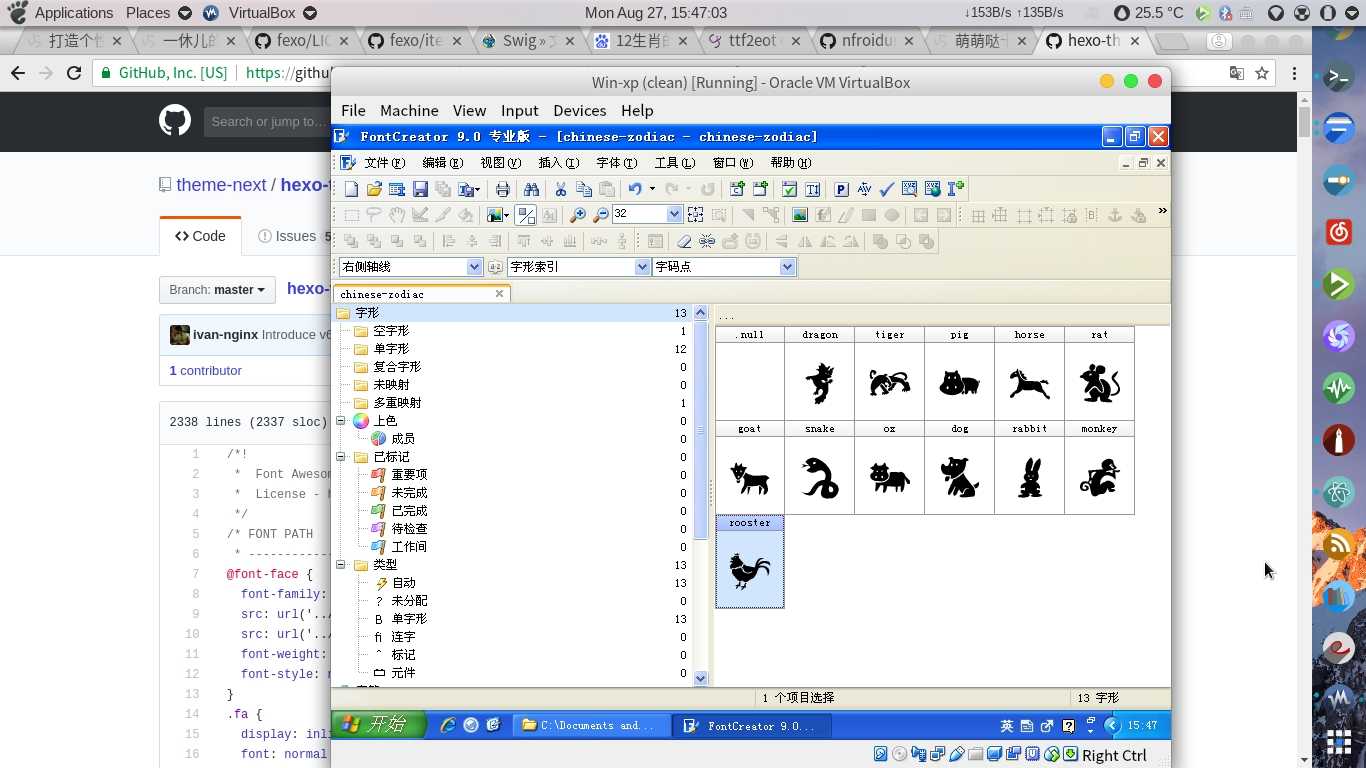
主要有以下几项:
- 字体名称,将 fontello 改为 chinese-zodiac;
- 字符数量,删除大部分,只保留了十二生肖;
- 字符名称,将拼音修改为相应英文[3];
- 字体版权,添加原作者的版权信息;
- 字体描述,添加如图🌚。
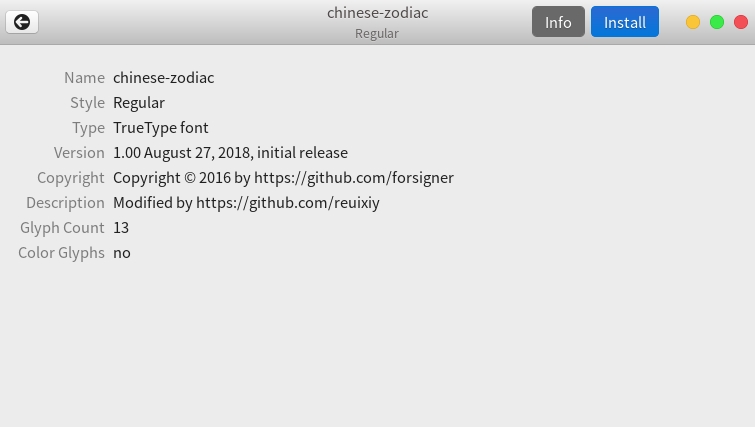
另外,ttf 和 woff 格式由 FontCreator 自动导出,eot 格式由一个在线网站[4]生成,woff2 格式由 ttf2woff2[5] 生成。
2)chinese-zodiac.swig
由于是代码小白,且不懂 swig 的语法,所以这个文件写的有点🌚... 参考了 Fexo 的 item-year.ejs[6] 的代码逻辑,参考了 swig 的中文文档[7]。
3)chinese-zodiac.css
没有这个文件啦🌚,我参考了 font-awesome.css[8] 和 fontello.scss[9] 的相关 CSS 代码。
链接:https://github.com/forsigner/fexo/blob/master/source/fonts/fontello.ttf ↩︎
链接:https://github.com/forsigner/fexo/blob/master/layout/_partial/component/item-year.ejs ↩︎
链接:https://myvin.github.io/swig.zh-CN/docs/tags/index.html#if ↩︎
链接:https://github.com/theme-next/hexo-theme-next/blob/master/source/lib/font-awesome/css/font-awesome.css ↩︎
链接:https://github.com/forsigner/fexo/blob/master/source/sass/_fontello.scss ↩︎