#文章前言
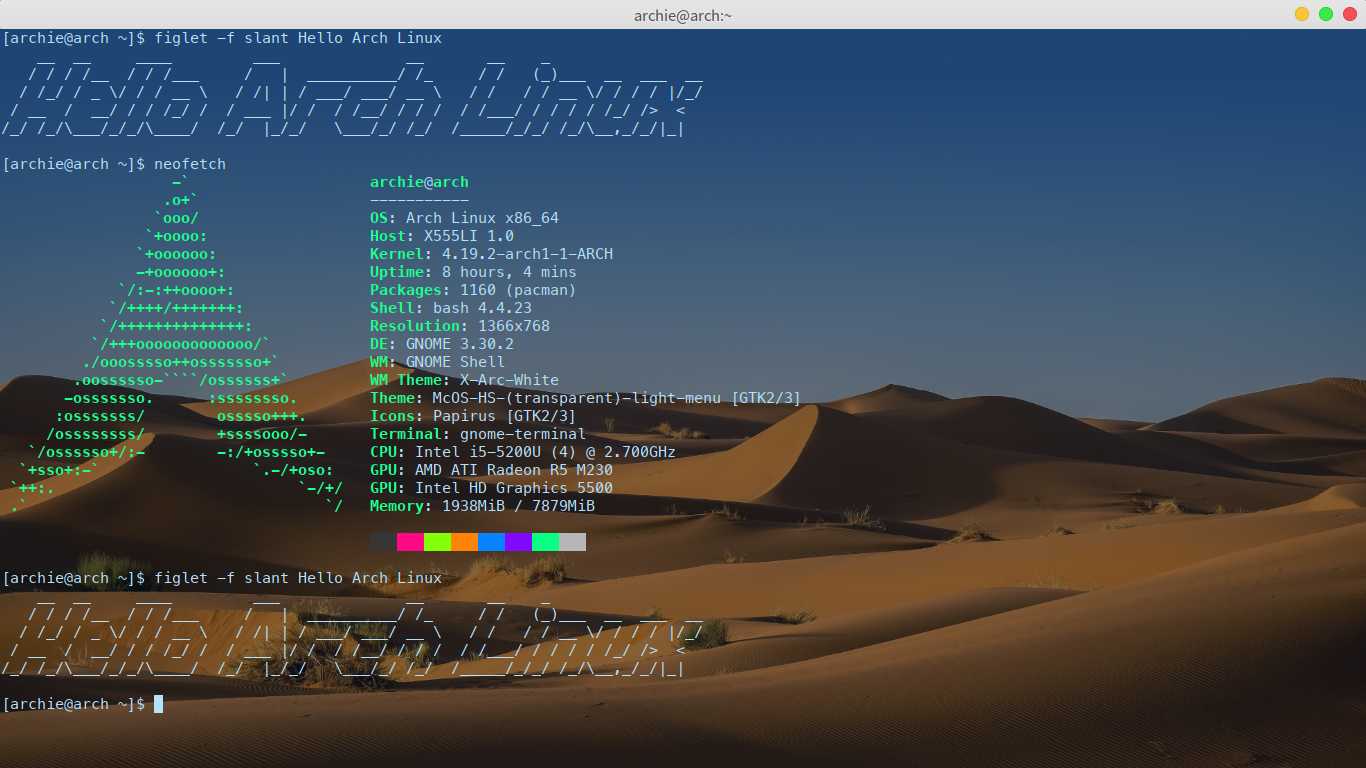
在硬盘暴废后,终于有机会将 Arch Linux 作为自己的主系统,并在物理机上彻底摆脱了 Windows,给了我这个「极简主义者 + 完美主义者」极大的愉悦😂。在安装和使用 Arch Linux 的过程中,自己也能切身体会到下面这句话:
A simple, lightweight linux distribution.
—archlinux
以及 KISS (Keep It Simple, Stupid!) 原则,以及:
Arch Linux focus on elegance, code correctness, minimalist system and simplicity.
更多可阅读:
- Arch Linux | Wikipedia
- Arch Linux | ArchWiki
- Arch Linux: The Simple, Flexible (and Fast!) Distro | Linux Magazine
使用 Arch Linux 的过程中,最令人满意及兴奋的莫过于它拥有丰富且快速更新的软件仓库,一些我之前在 Kali 无法直接 apt-get 安装的软件包,在 Arch Linux 都能直接用 pacman 安装最新稳定版(或用 yay 直接安装 AUR 中的软件包,比如驱动)。更重要的一点,直接用 C 语言编写的软件包管理器 Pacman 体验极佳,高效!
另外,Arch Linux 的 Wiki 可以说非常完备,从系统的安装到配置,以及软件的安装到配置,都非常详细。下面,记录一下我安装 Arch Linux 的过程,以及一些配置的细节。
提示:如果在安装、配置过程中有疑问,或者遇到报错,直接 arch linux + 英文描述 Google 就能迅速解决。
#视频预览
#安装配置
我的安装环境:物理机 + 两块全新硬盘 + UEFI + 有线网络(直连路由器)。
#安装系统
对于新手,下文中用 vim 的操作都可以用对新手友好的 nano 操作。
#安装介质
Windows 下去官网下载 ISO 文件,然后用 Win32 Disk Imager 写入准备好的且空的 U 盘。
#开始安装
Arch Linux 的安装需要网络连接,检查电脑是否接好从路由器来的网线。插入 U 盘,开机按 ESC 键选择 U 盘启动,顺利进入 UEFI 安装界面:
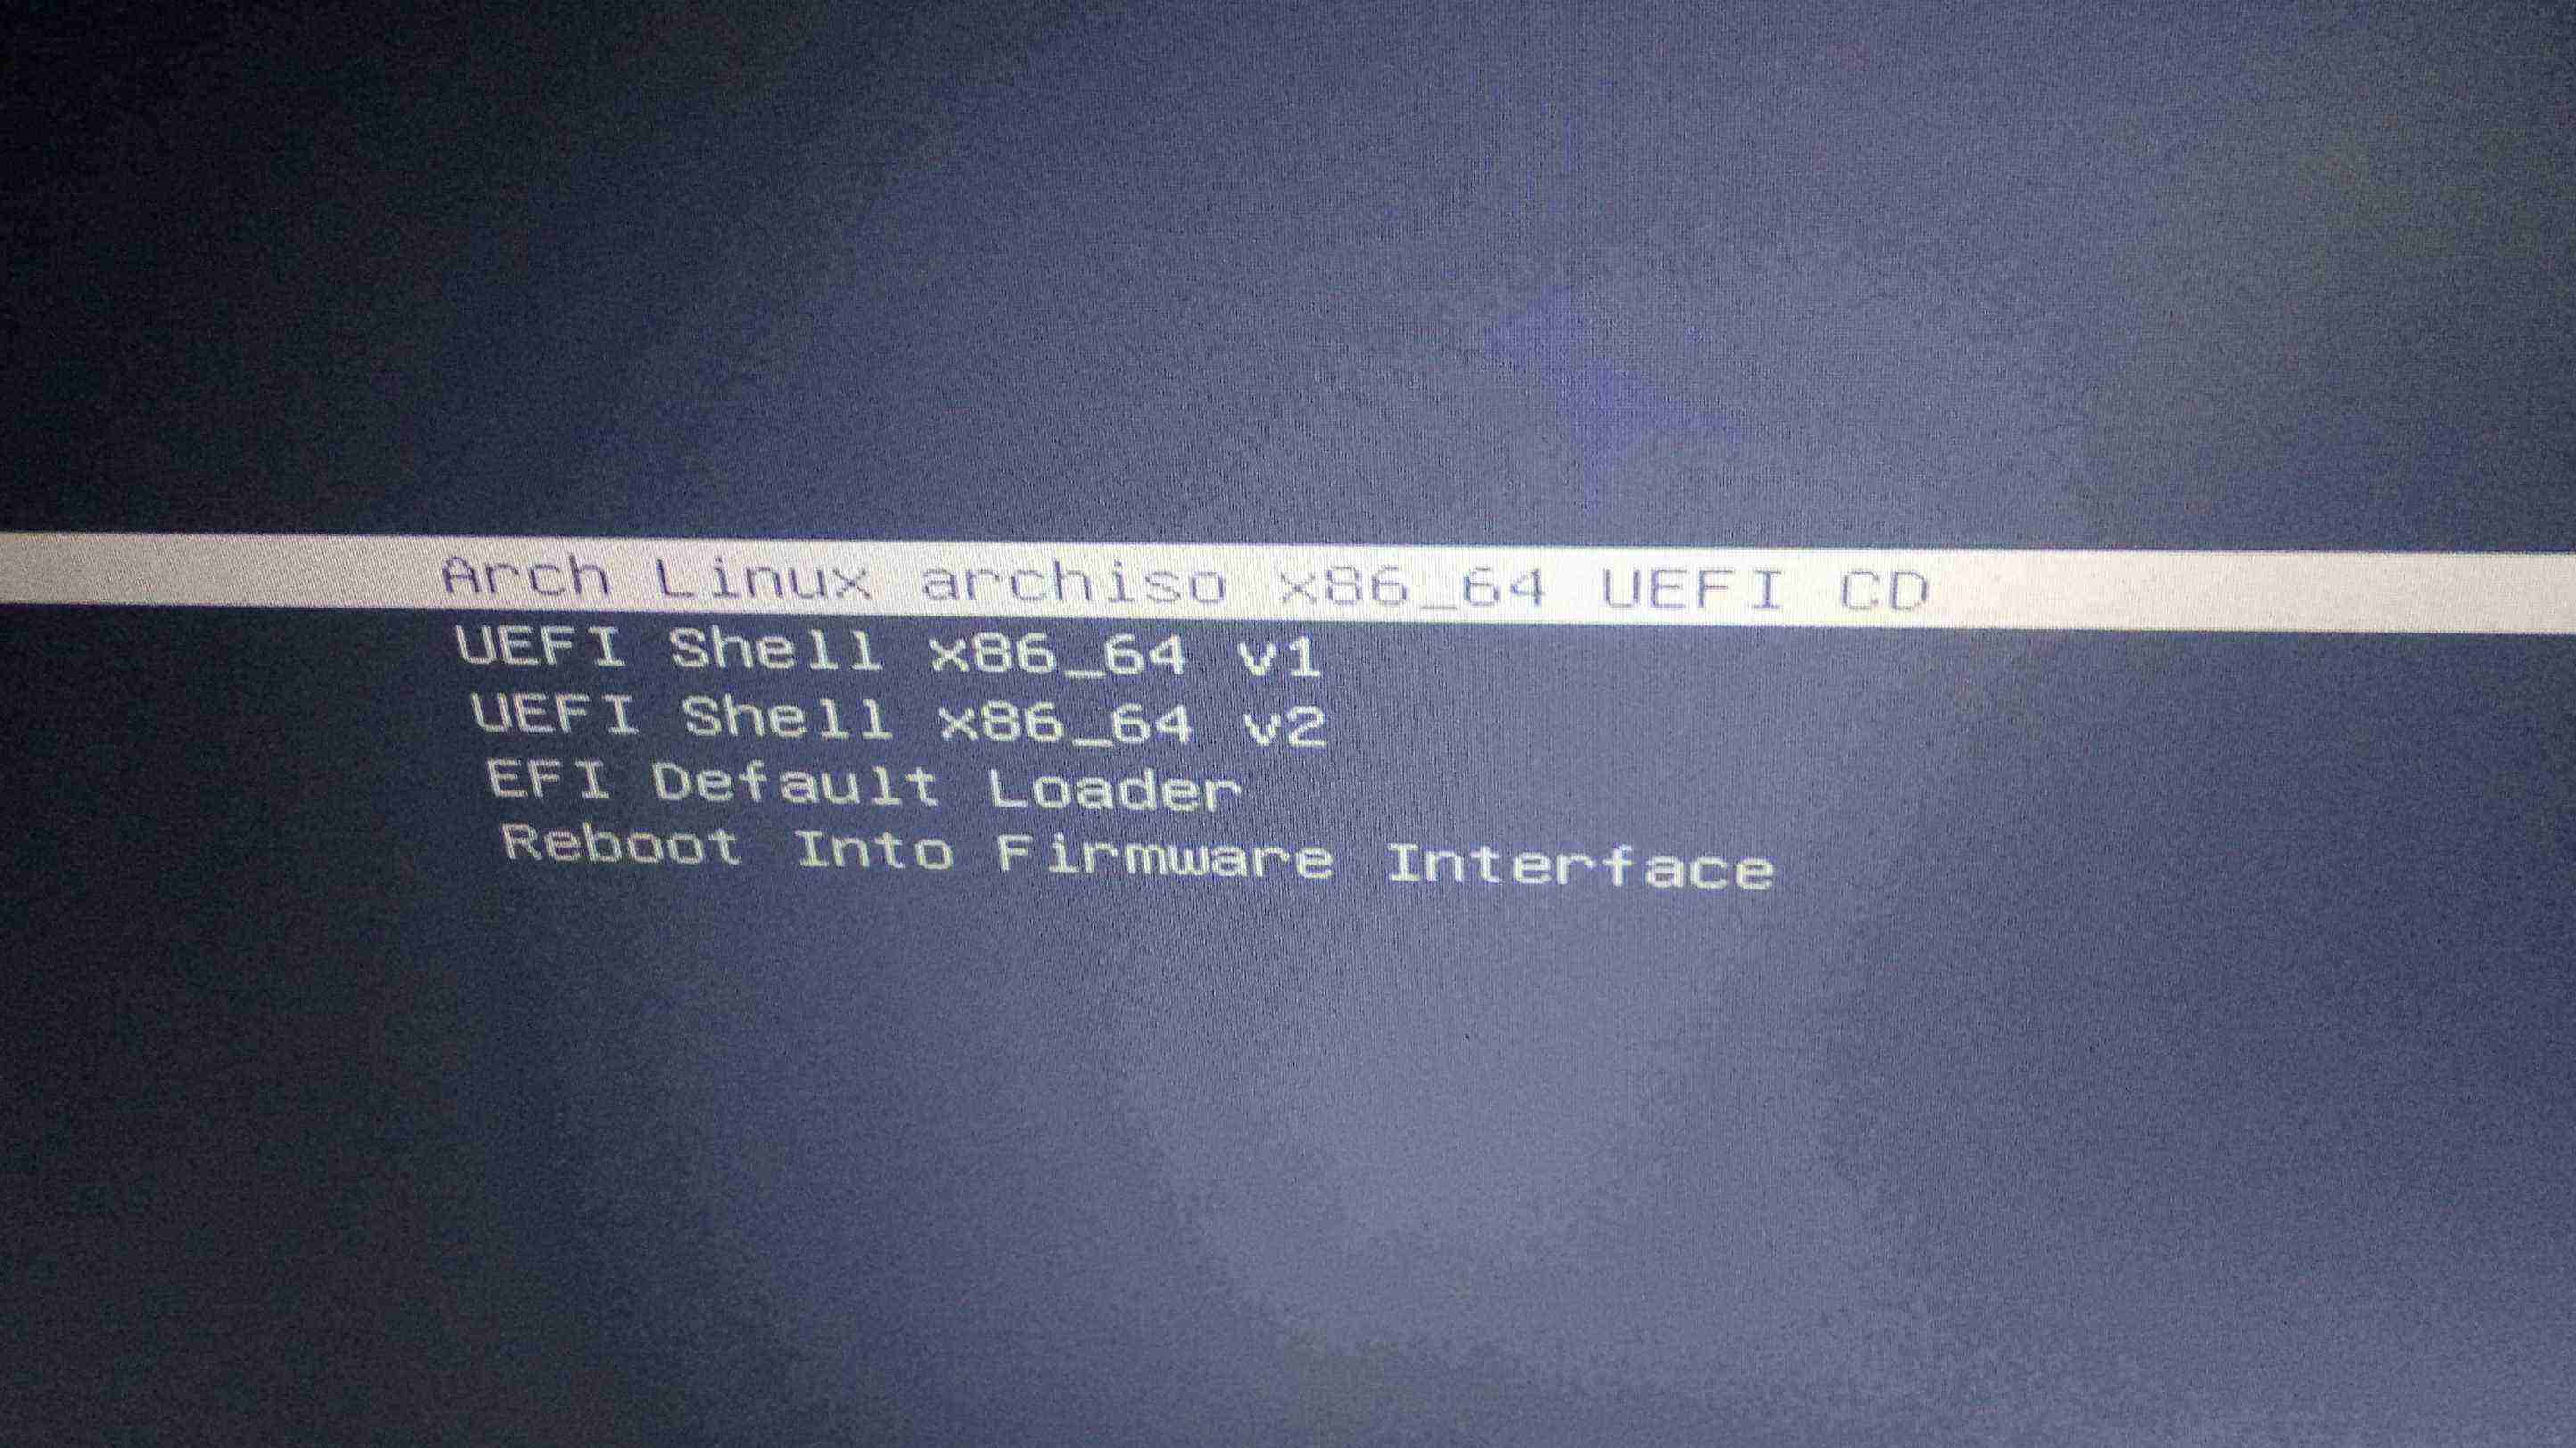
直接第一个启动,稍等片刻后顺利进入 U 盘中的系统,终端命令行界面,鼠标无效。
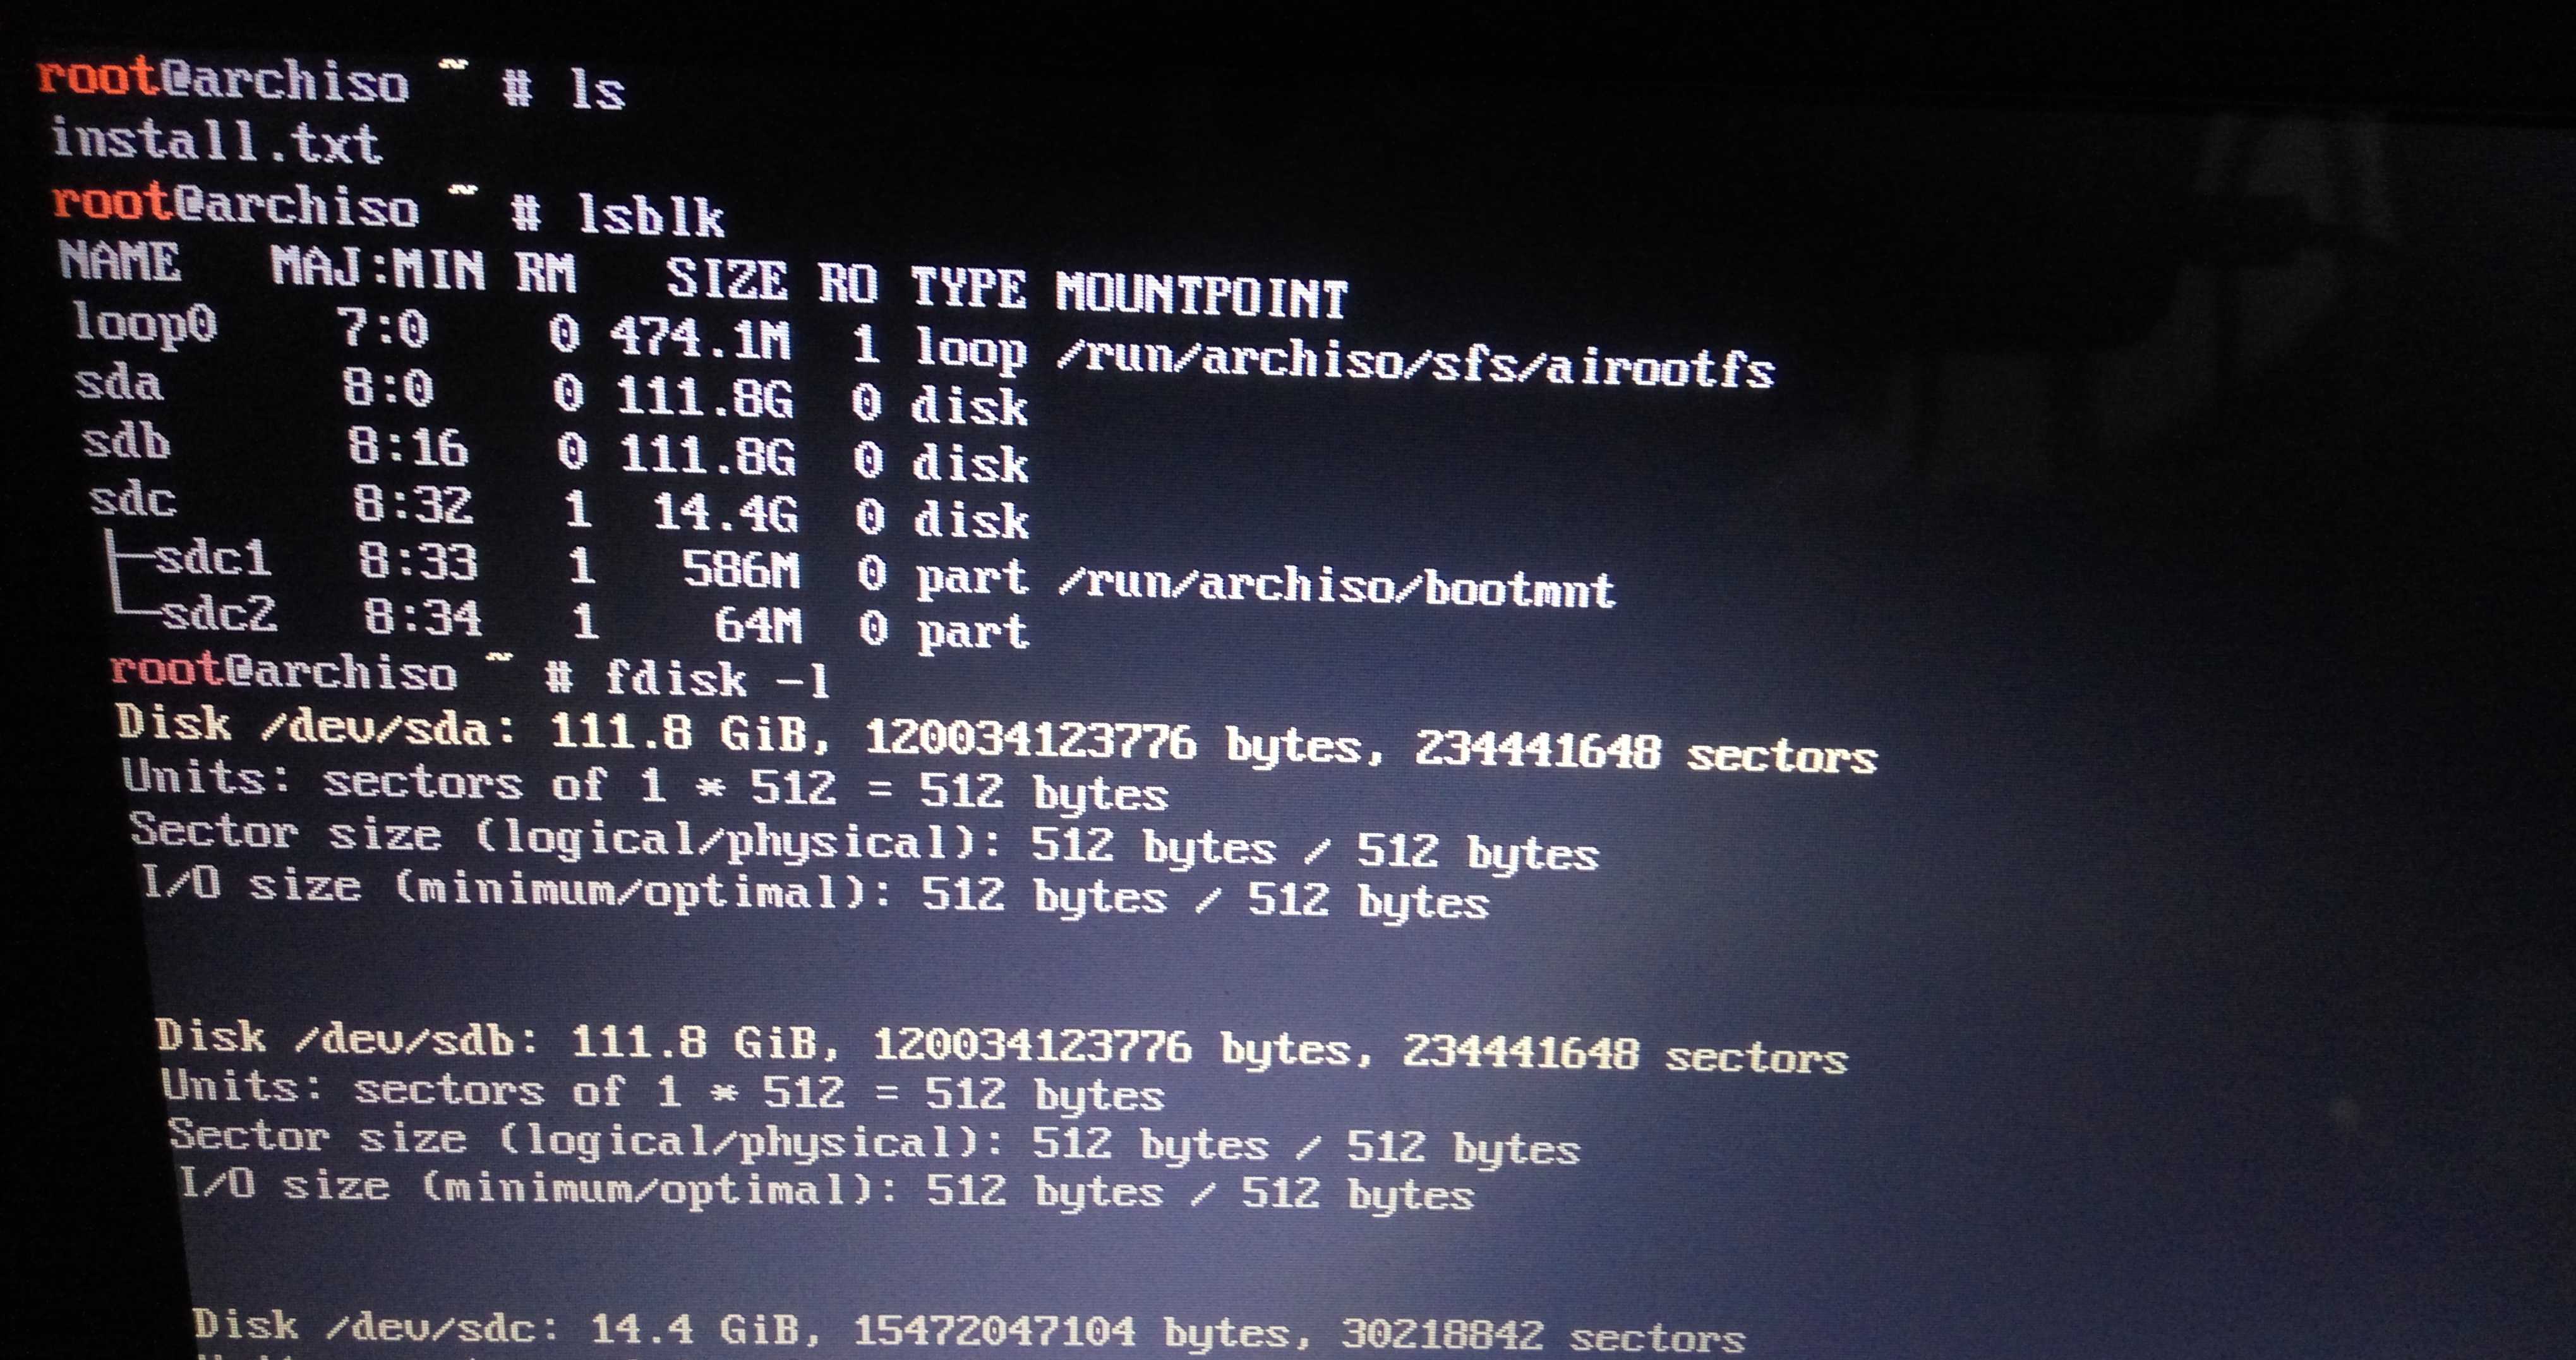
输入 ls 回车查看当前目录下的文件,看到有个 install.txt 安装教程。可输入命令 cat i + tab 键自动补全后回车查看(shift + pgup/pgdn 可上下翻页),也可用 vim 或 nano 查看。
#验证启动模式
# ls /sys/firmware/efi/efivars
有输出,确认启动模式为 UEFI,确认无误。
#验证网络连接
# ping archlinux.org -c 3
检查输出,0% packet loss,网络连接正常。
#更新系统时间
# timedatectl set-ntp true
检查:
# timedatectl status
确认无误。
#硬盘分区
lsblk 和 fdisk -l 查看硬盘的信息,可以看到两个全新的 120G 硬盘,确认无误。
事先准备好的方案:
| 分区 | 文件系统 | 大小 | 描述 | 挂载点 |
|---|---|---|---|---|
| sda1 | fat32 | 256 MiB | EFI 引导分区 | /boot/efi |
| sda2 | ext4 | 余下所有 | 系统根分区 | / |
| sdb | ext4 | 整块硬盘 | 家目录 | /home |
再次 lsblk 查看硬盘的信息,核对无误后进行分区操作。
# fdisk /dev/sda
回车后进入 fdisk 的操作界面,按提示输入 m 后查看手册,输入 p 显示硬盘当前的分区,确认无误后继续进行分区操作。
1)创建分区表,输入 g 创建一个全新的 GPT (GUID Partition Table) 分区表。
2)创建 sda1 分区,输入 n 创建一个新的分区,分区类型默认回车,分区序号默认回车,起始扇区默认回车,结束扇区输入 +256M 回车。
3)修改分区类型,输入 t,分区序号默认回车,可输入 l 查看所有支持的类型,输入 ef 更改分区的类型为 EFI。输入 p 检查无误。
4)创建 sda2 分区,输入 n 创建一个新的分区,分区类型默认回车,分区序号默认回车,起始扇区默认回车,结束扇区默认回车。由于默认的分区类型即为 Linux filesystem,所以无需更改。输入 p 检查无误。
5)再次检查,确认无误,输入 w 回车后写入硬盘,稍等片刻,分区结束。
#文件系统
lsblk 查看硬盘的信息,然后进行格式化操作。
格式化 sda1:
# mkfs.fat -F32 /dev/sda1
格式化 sda2:
# mkfs.ext4 /dev/sda2
格式化 sdb:
# mkfs.ext4 /dev/sdb
#挂载分区
# mount /dev/sda2 /mnt

# mkdir -p /mnt/boot/efi
# mount /dev/sda1 /mnt/boot/efi

# mkdir /mnt/home
# mount /dev/sdb /mnt/home
输入 lsblk,确认无误。
#选择镜像源
推荐使用 reflector:
# pacman -Syyy reflector
# reflector -c China -a 6 --sort rate --save /etc/pacman.d/mirrorlist
# pacman -Syyy
或者,可以手动编辑文件:
# vim /etc/pacman.d/mirrorlist
1)按下 / 进入搜索界面,然后输入 ## China 回车,按下 2 选择两行,按下 dd 剪切,按下 gg 回到文件首,移动光标,按下 p 粘贴。
2)再次按下 / 进入搜索界面,按下方向键 ↑ 后回车继续搜索,然后按下 n 搜索下一个(N 搜索上一个),重复上面剪切粘贴操作(u 撤销操作)。
3)最后,按下 ESC 键,然后输入 :wq 保存并退出(q! 不保存退出)。
当然,也可以不用 vim 用 nano。
#安装基本系统到硬盘
# pacstrap -i /mnt base base-devel linux linux-firmware dhcpcd
默认回车,然后输入 y,等待一会,等待安装完成。
#配置系统
经过上一步的操作,系统已经复制(安装)到了我们的硬盘,但此时直接重启是无法进入系统的。接下来,进行一些必备配置以供启动,以及一些本地环境的配置。
#生成挂载表
生成自动挂载分区的 fstab 文件:
# genfstab -U -p /mnt >> /mnt/etc/fstab
检查一下:
# cat /mnt/etc/fstab
确认无误。
#时区和语言
考虑到地球上的不同地区有不同时区与语言,所以必须配置下系统的本地环境。另,考虑到重启一次系统很麻烦,故直接在此先行配置。
1)先切换到硬盘安装的新系统:
# arch-chroot /mnt /bin/bash
这意味着直到我们 exit 之前,下面所有的操作都是在硬盘中的系统中运行,而非 U 盘。
2)设置时区:
# ln -sf /usr/share/zoneinfo/Asia/Hong_Kong /etc/localtime
# hwclock --systohc --utc
你也可以选择 Shanghai,我习惯了 HKT,它们的时间是一样的。
3)配置系统语言环境:
# nano /etc/locale.gen
按下 ctrl + w 搜索,分别输入 en_US 和 #zh,分别找到下面两行,并删除前面的 # 注释符:
en_US.UTF-8 UTF-8
zh_CN.UTF-8 UTF-8
完成后按下 ctrl + o 回车保存,然后按下 ctrl + x 退出。
最后执行:
# locale-gen
台湾的朋友,请用 zh_TW.UTF-8 替代 zh_CN.UTF-8。
4)设置本地语言环境:
# nano /etc/locale.conf
输入以下内容:
LANG=en_US.UTF-8
保存并退出。
对于本地语言环境,建议 English,理由如下:
- Wiki 中提到的问题。
- 用英文作为系统的界面和程序的菜单的语言更为优雅。因为中文作为我们的母语,会比英文更吸引我们的注意力。我们的要专注的是在界面内或程序的操作,而不是菜单,故用英文更为优雅。
- 配置简单,顺便学英语。
#安装引导程序
# pacman -S grub efibootmgr
# grub-install --target=x86_64-efi --bootloader-id=GRUB --efi-directory=/boot/efi
# grub-mkconfig -o /boot/grub/grub.cfg
#设置主机名
对于桌面用户,所谓主机名,即终端 @ 符后面的名字,也是本地局域网内其它设备所见的名字。
# echo arch > /etc/hostname
# nano /etc/hosts
在文件末添加以下内容:
127.0.0.1 localhost
::1       localhost
127.0.1.1 arch.localdomain  arch
检查无误后,ctrl + o 保存,ctrl + x 退出。
#提前配置网络
# pacman -S networkmanager
# systemctl enable NetworkManager
#设置 root 的密码
# passwd
输入后回车即可,输入时无显示,需输入两次。
#新建普通用户
# useradd -m -g users -G wheel -s /bin/bash archie
设置普通用户的密码:
# passwd archie
设置普通用户的权限:
# EDITOR=nano visudo
找到下面内容并删除相应两行前面的 # 注释符:
## Uncomment to allow members of group wheel to execute any command
%wheel ALL=(ALL) ALL

## Same thing without a password
%wheel ALL=(ALL) NOPASSWD: ALL
#重启系统
回到 U 盘中的系统:
# exit
重启:
# umount -R /mnt
# reboot
开机时按 ESC 进入 BIOS 设置硬盘的启动顺序,然后拔掉 U 盘,保存后从 BIOS 重启。
用普通用户 archie 及设置的密码登入,登入后为终端命令行界面,鼠标无效。
#完善系统
到此,系统已安装完成,但有的只是终端命令行界面。接下来,安装图形界面,以及进行一些对系统的完善配置。
#启用微码更新
$ sudo pacman -S intel-ucode
$ sudo grub-mkconfig -o /boot/grub/grub.cfg
#完善显卡驱动
$ sudo pacman -S xf86-video-intel intel-media-driver vulkan-intel xf86-video-amdgpu xf86-video-ati mesa-vdpau vulkan-radeon
#安装图形界面
$ sudo pacman -S xorg xorg-server xorg-xinit gnome gnome-extra
$ systemctl enable gdm
重启,GDM (GNOME Display Manager) 登陆界面,用普通用户 archie 登入系统,顺利进入 GNOME 桌面。
发现会有卡顿,将 Wayland 更改为 Xorg:
$ sudo vim /etc/gdm/custom.conf
更改:
[daemon]
# Uncoment the line below to force the login screen to use Xorg
-#WaylandEnable=false
+WaylandEnable=false
重启后解决。
#LightDM
用更轻量级的 LightDM 替换 GDM:
$ sudo pacman -S lightdm lightdm-gtk-greeter
$ systemctl disable gdm
$ systemctl enable lightdm
重启系统,选择 Gnome on Xorg 启动。
同时,发现启动界面有两个重复的 Gnome 选项,解决方法:
$ sudo mv /usr/share/wayland-sessions/gnome.desktop /usr/share/wayland-sessions/gnome.desktop.bak
https://forum.antergos.com/topic/6679/gnome-appearing-twice-in-greeter
#声音配置
进入系统后,默认静音,怎么解决呢?
$ sudo pacman -S alsa-utils pulseaudio pulseaudio-alsa pavucontrol
$ man alsamixer
$ alsamixer
$ sudo alsactl store
其中,输入 alsamixer 后按下 f1 键查看说明操作:
- 按下
f3键选择播放设备,m键取消静音,按下5键设置为 50%; - 按下
f4键选择录音设备,同样设置为 50%,然后按下空格键关闭录音; - 按下
esc键退出。
此外,对于 GNOME,可能要配置下系统提示声音,顶栏最右单击后 > 设置按钮 > Sound:
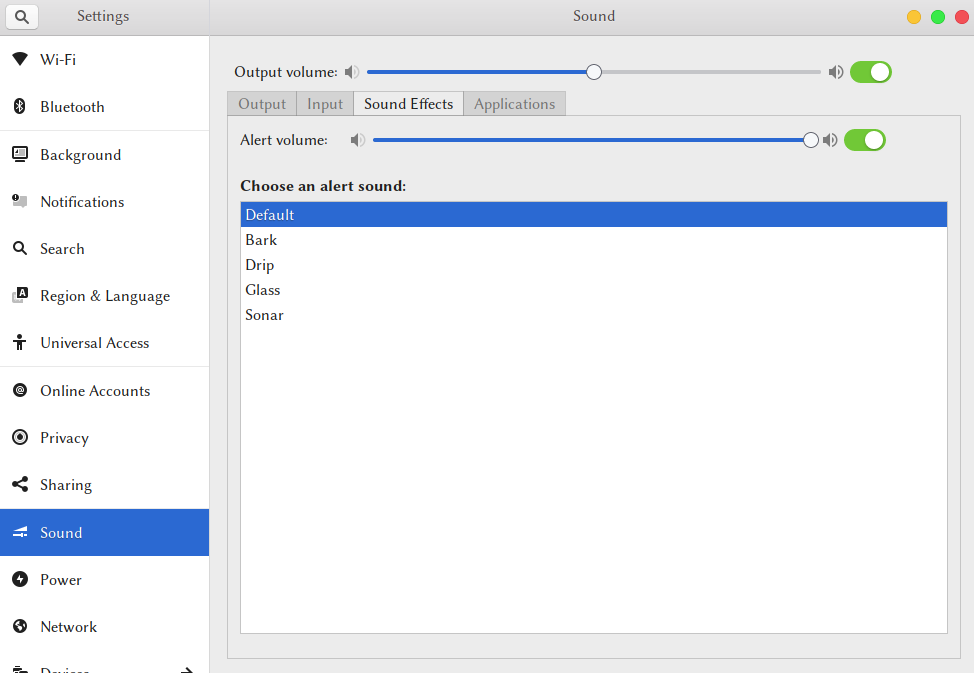
https://wiki.archlinux.org/index.php/Advanced_Linux_Sound_Architecture#Unmute_with_alsamixer
#显示屏亮度
对于强迫症用户(比如我),可能在将音量设置为 50% 的同时,也必须把显示屏亮度设置为 50%。
$ xbacklight -set 50
https://wiki.archlinux.org/index.php/backlight#xbacklight
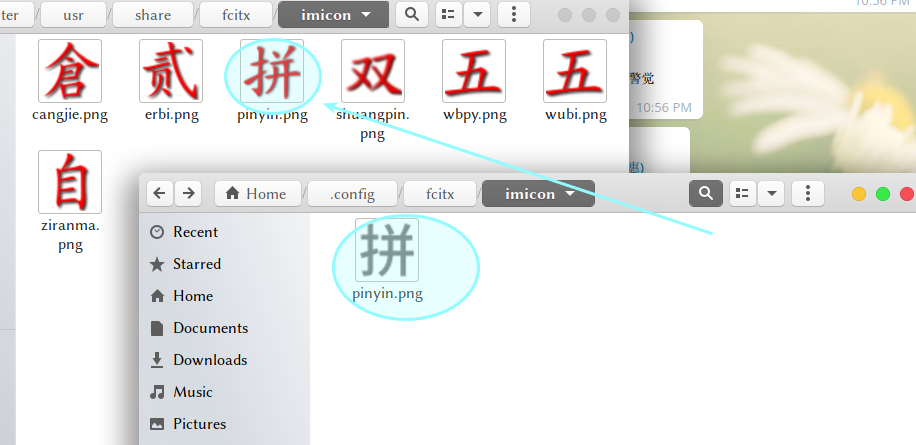
#安装输入法
$ sudo pacman -S fcitx-im fcitx-configtool
- 默认回车,全部安装。
- GNOME 设置界面 > Keyboard > Input Sources,删除 English。
- 打开终端,输入
fcitx-configtool回车后出现一个设置界面,左下角+添加 Pinyin,关闭界面。
这样应该就能输入中文了,任意一个窗口,单击左 shift 键切换即可输入。
https://wiki.archlinux.org/index.php/Fcitx
https://www.jianshu.com/p/15c45afc7d80
#驱动问题
发现 GNOME 无 Wi-Fi 显示,蓝牙无法开启,缺少驱动。Google 并根据 Wiki 的相关命令查看,发现笔记本是很坑的博通 BCM43142 芯片,无线 + 蓝牙二合一。
#无线
首先,根据 Wiki 查看芯片的信息:
$ lspci -vnn -d 14e4:
然后,去 brcm80211 and b43 的列表搜索,发现内核驱动仍在开发之中。
只得暂时安装闭源的 broadcom-wl:
$ sudo pacman -S broadcom-wl
#蓝牙
首先,根据 Wiki 查看芯片的信息:
$ lsusb
找到芯片型号 BCM43142A0,Google arch linux BCM43142A0 发现强大的 AUR 中有,于是直接安装(yay 的安装请看下文):
$ yay -S bcm43142a0-firmware
驱动解决后,继续按照 Wiki 的指示:
$ sudo pacman -S bluez bluez-utils pulseaudio-bluetooth
$ systemctl enable bluetooth
https://wiki.archlinux.org/index.php/bluetooth https://lujun9972.github.io/blog/2017/07/18/在archlinux中使用蓝牙耳机/
#显卡
首先,驱动的安装可参考:
- https://wiki.archlinux.org/index.php/Xorg
- https://wiki.archlinux.org/index.php/intel_graphics
- https://wiki.archlinux.org/index.php/ATI
- https://wiki.archlinux.org/index.php/NVIDIA
- https://wiki.archlinux.org/index.php/Hardware_video_acceleration
我的研究成果在上文的完善显卡驱动。
然后,对于 AMD 独显的电脑,配置似乎很复杂,我花了很多时间后依然无法禁用默认的 radeon 驱动,依然无法让 Steam 识别到我的独显。
最后,考虑到我目前的笔记本过于垃圾,一些大型游戏本身就无法良好运行,因此暂时不继续研究。
1)Intel 集显的屏幕撕裂问题:
; 文件位置:/etc/X11/xorg.conf.d/20-intel.conf(新建)

Section "Device"
  Identifier  "intel"
  Driver      "intel"
  Option      "TearFree" "true"
EndSection
<!-- 文件位置:~/.drirc(新建) -->

<device screen="0" driver="dri2">
  <application name="Default">
    <option name="vblank_mode" value="0"/>
  </application>
</device>
https://wiki.archlinux.org/index.php/Intel_graphics#Troubleshooting
2)显卡的配置:
; 文件位置:/etc/X11/xorg.conf.d/20-radeon.conf(新建)

Section "Device"
  Identifier  "radeon"
  Driver "radeon"
  Option "AccelMethod" "glamor"
        Option "DRI" "3"
        Option "TearFree" "on"
        Option "ColorTiling" "on"
        Option "ColorTiling2D" "on"
EndSection
https://wiki.archlinux.org/index.php/ATI#Performance_tuning
3)解决驱动问题时,一些有用的获取信息的命令:
- dmesg
- lsusb
- lspci
- lsmod
- sudo lspci -kv
4)几个查看显卡信息的命令:
lspci -nnk | grep "VGA\|'Kern'\|3D\|Display" -A2xrandr --listproviderssudo cat /sys/kernel/debug/vgaswitcheroo/switch
5)几点提示:
- 如果修改后重启黑屏,无法进入图形界面,可按下左 alt + f2/f3/f4/f5/f6 进入命令行界面修复。
- 如果在图形界面卡住,可按下左 ctrl + alt + f2/f3/f4/f5/f6 进入命令行界面重启。
- 如果不小心从图形界面进入了命令行界面,可按下左 alt + f7 回到图形界面。
#SSD 优化
减少系统对固态硬盘的读写,提高固态硬盘的使用寿命。
#开启 TRIM
如果不支持,千万别用,否则可能会导致数据丢失!
先查看是否支持:
$ lsblk --discard
如果输出的 DISC-GRAN (discard granularity) 和 DISC-MAX (discard max bytes) 两列的值不为 0,则表明支持。
$ sudo vim /etc/fstab
添加 noatime 和 discard:
# /dev/sda1
UUID=   /boot/efi   vfat      rw,noatime,discard  0 2

# /dev/sda2
UUID=   /           ext4      rw,noatime,discard  0 1

# /dev/sdb
UUID=   /home       ext4      rw,noatime,discard  0 2
#更换 I/O scheduler
$ sudo vim /etc/default/grub
找到下面这行,添加 elevator=noop :
GRUB_CMDLINE_LINUX_DEFAULT="elevator=noop ..."
生成 GRUB 配置文件:
$ sudo grub-mkconfig -o /boot/grub/grub.cfg
#迁移高读写文件到 tmpfs
$ sudo vim /etc/fstab
行尾添加:
tmpfs /tmp      tmpfs defaults,noatime,mode=1777 0 0
tmpfs /var/log  tmpfs defaults,noatime,mode=1777 0 0
tmpfs /var/tmp  tmpfs defaults,noatime,mode=1777 0 0
将 Google Chrome 的缓存挂载到 /tmp:
$ cd ~/.cache/google-chrome/Default/ && rm -rf Cache && ln -sf /tmp Cache
参考:
- https://wiki.archlinux.org/index.php/Solid_state_drive
- https://wiki.archlinux.org/index.php/Improving_performance
- https://wiki.archlinux.org/index.php/Fstab#atime_options
- http://oenhan.com/linux-ssd-optimization
- https://www.jianshu.com/p/nQpqsN
- http://ju.outofmemory.cn/entry/235346
#查看固态硬盘信息
$ sudo pacman -S hdparm smartmontools
$ sudo hdparm -I /dev/sda
$ sudo smartctl -t short /dev/sda
等待两分钟后,查看报告:
$ sudo smartctl -l /dev/sda
更多请自行查看 Wiki:
另外,也可以用 GNOME 自带的有图形界面的 Disks 查看硬盘的 SMART Data & Self-Tests。
#测试固态硬盘速度
1)dd
$ sudo dd if=/dev/zero of=/tmp/test.img bs=1G count=1 oflag=dsync
当然,要测试两块硬盘之间复制文件的速度,将 of 的目录更改为挂载在另一块硬盘的目录即可。
2)hdparm
$ sudo hdparm -tT /dev/sda
https://wiki.archlinux.org/index.php/benchmarking
#现代桌面
一个现代的桌面,不仅要有现代的 UI 和现代的 UX,还要有丰富易用的软件。
GNOME 各种主题的安装可暂时先查看这篇文章(我目前的图标主题是 Papirus)。
#基本配置
GNOME 的电源设置,Settings > Power:
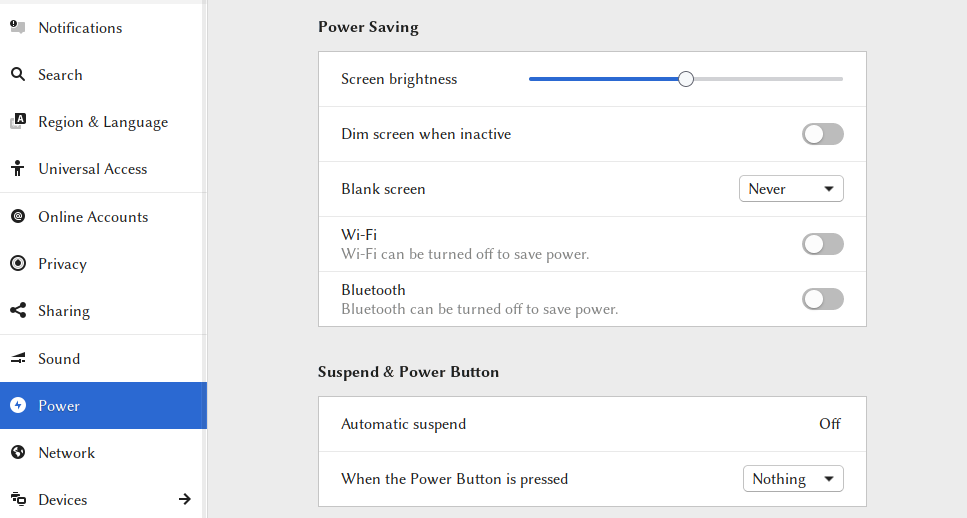
另外,Tweaks 关闭盖上盖子后休眠,Tweaks > General > Suspend when laptop lid is closed。
#软件安装
感谢开源,Linux 下诞生了各种各样的软件,且这些软件的安装,只需在终端中输入一行命令即可完成安装,快速便捷。
#必备工具
$ sudo pacman -S git vim
$ sudo pacman -S wget curl
$ sudo pacman -S ntfs-3g exfat-utils p7zip unzip unrar
| 名字 | 说明 | 必须? |
|---|---|---|
| git | 版本控制系统 | 是 |
| vim | 一个会上瘾的编辑器 | 否 |
| wget | 下载工具 | 是 |
| curl | 下载工具 | 是 |
| ntfs-3g | Windows 的 NTFS 文件系统支持 | 是 |
| exfat-utils | exFAT 文件系统支持(U 盘) | 是 |
| p7zip unzip unrar | .7z、.zip、.rar 压缩文件格式支持 | 是 |
#yay
对于 Arch Linux,最具特色也是最强大的莫过于它丰富的 AUR (Arch User Repository),而 yay 就是一个安装这个仓库的软件的便捷工具。
$ git clone https://aur.archlinux.org/yay.git
$ cd yay
$ makepkg -si
$ cd ..
$ rm -rf yay
#必备软件
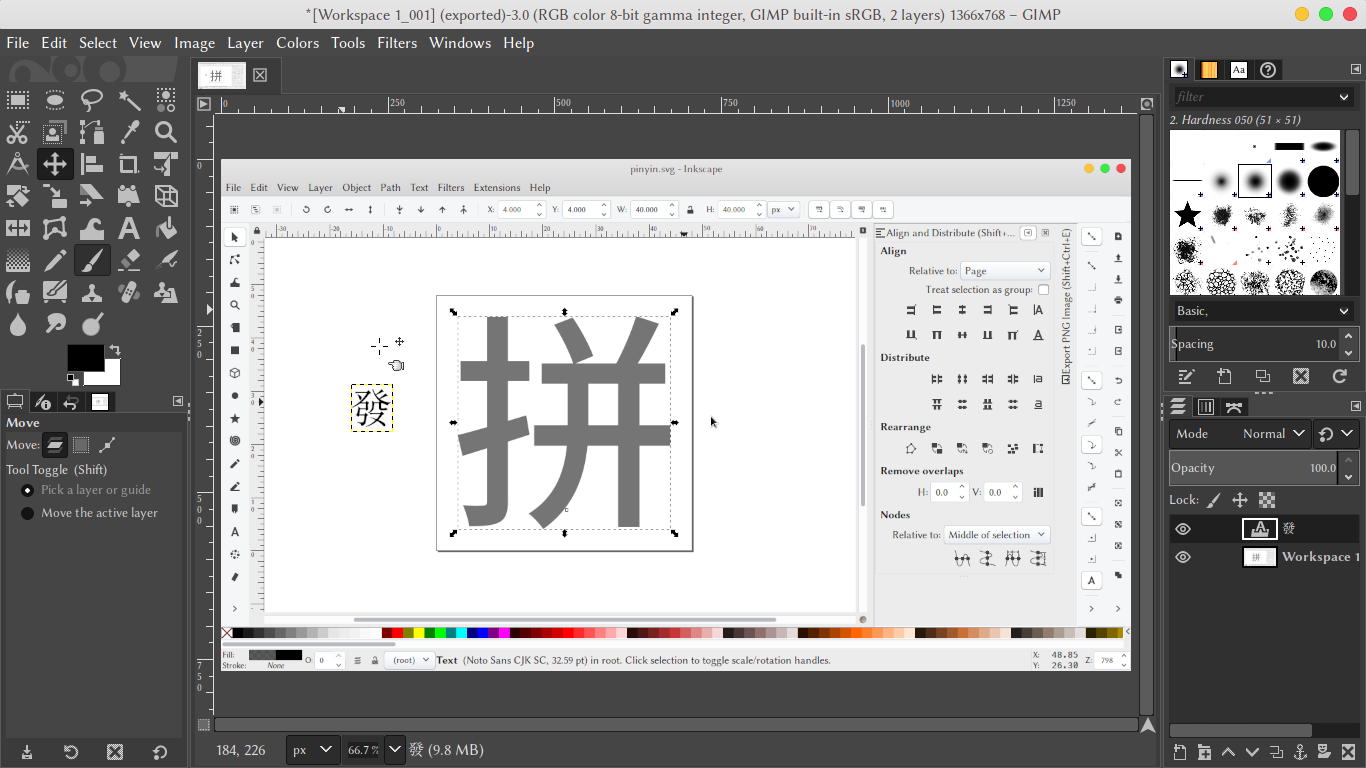 ※ 使用 GIMP 编辑图片
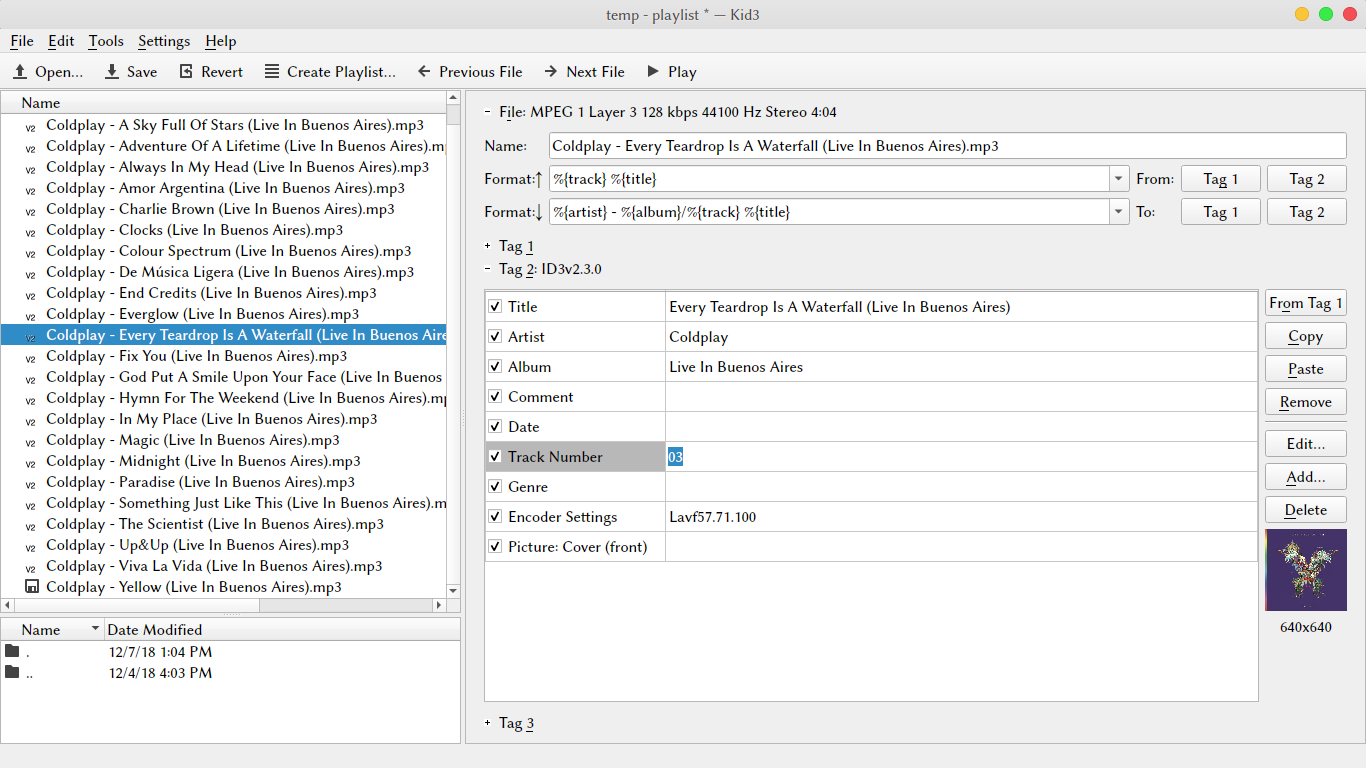 ※ 使用 Kid3 编辑 .mp3 的元数据
| 名字 | 说明 | 类似 |
|---|---|---|
| google-chrome | Google Chrome 浏览器 | * |
| visual-studio-code-bin | Visual Studio Code | * |
| netease-cloud-music | 网易云音乐 | * |
| Flameshot | 现代、快捷、轻便的截图工具 | * |
| proxychains-ng | 终端内科学上网代理工具 | * |
| redshift | 显示屏色温调节工具 | f.lux |
| vlc | 强大的多媒体播放工具 | * |
| deadbeef | 终极音频播放软件 | foobar2000 |
| telegram-desktop | 客户端开源的加密聊天工具 | * |
| liferea | RSS 阅读器 | * |
| qbittorrent | 好用的 BT 下载工具 | * |
| calibre | 电子书转换、编辑、阅读工具 | * |
| gthumb | 图片浏览工具,可简单编辑图片,可清除照片元数据 | * |
| libreoffice-fresh | 必备的办公软件 | Microsoft Office |
| peek | 录制 GIF 动图 | * |
| gimp | 强大的图片编辑工具 | Adobe Photoshop |
| inkscape | 强大的矢量图形编辑软件 | Adobe Illustrator、CorelDraw |
| shotcut | 强大的视频剪辑软件 | Adobe Premiere |
| fontforge | 字体设计、编辑软件 | FontCreator |
| audacity | 简单的音频编辑软件 | GoldWave |
| kid3 | 音频元数据编辑软件 | Mp3tag |
| aria2 | 强大的多线程下载工具 | * |
| youtube-dl | YouTube 视频下载工具 | * |
| baidupcs-go-git | 百度网盘下载工具 | * |
| ncmdump-go | 网易云音乐的 .ncm 格式转换工具 | * |
$ yay -S google-chrome visual-studio-code-bin netease-cloud-music proxychains-ng baidupcs-go-git ncmdump-go
$ sudo pacman -S redshift vlc deadbeef telegram-desktop liferea qbittorrent calibre gthumb libreoffice-fresh peek gimp inkscape shotcut fontforge audacity kid3 aria2 youtube-dl flameshot
https://www.addictivetips.com/ubuntu-linux-tips/best-audio-tools-for-linux/
#软件配置
与 Windows 下的直接用图形界面配置不同,Linux 上的软件经常需要通过修改一些文件来配置。一开始可能会觉得头大,但经历几次后就会觉得并不麻烦,并能产生一些更深入的理解。
#Redshift
这是一个非常棒的色温调节软件,即护眼模式。
1)新建配置文件:
~ $ mkdir .config/redshift
~ $ vim .config/redshift/redshift.conf
加入:
[redshift]
location-provider=manual
temp-day=5500
temp-night=3700

[manual]
lat=48.853
lon=2.349
经纬的计算可以查看我的这篇文章。
2)添加自动启动。
Tweaks > Startup Applications > +
添加的是 redshift-gtk,更改为 redshift:
$ sed -i 's/redshift-gtk/redshift/g' ~/.config/autostart/redshift-gtk.desktop
https://wiki.archlinux.org/index.php/redshift
http://jonls.dk/redshift/
#Flameshot
可以配置下快捷键,使用起来更加快捷。去 Settings > Devices > Keyboard,然后下拉页面到底部,点击 + 号,Name 填 Flameshot,Command 填 flameshot gui,然后点击下 Shortcut 的右方方块,按下 win + prt 键,设置好后如下图。
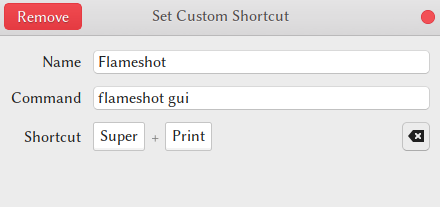 ※ 快捷键设置
当然,你还可以在托盘右键设置一下,启用 Text 文字标注功能、设置文件命名规则、关闭托盘图标的显示(关闭后如需再配置:终端输入 flameshot config 即可)。另外,怎么更换注释的颜色呢?鼠标右键长按,然后移动选择即可。怎么修改工具的大小呢?鼠标滚轮滚动即可。交互非常人性、非常现代!
https://itsfoss.com/take-screenshot-linux/
https://flameshot.js.org/#/key-bindings
#阿里云 OSS Browser
这个博客的图床是阿里云的 OSS,用 OSS Browser 可以方便地上传图片。
下载:https://github.com/aliyun/oss-browser
解压后放到一个固定文件夹,然后打开关闭。
添加启动文件:
~ $ vim .local/share/applications/oss-browser.desktop
[Desktop Entry]
Encoding=UTF-8
Name=Oss Browser
Exec=ossbrowser
Icon=/home/archie/Documents/softwares/linux/oss-browser/resources/custom/icon.png
Terminal=false
Type=Application
Categories=Development;
在 Applications 菜单中找到打开或按下 alt 左边的键找到打开后,Dash/Dock 右键 Add to Favarites 即可。
https://bbs.aliyun.com/read/569655.html
#ProxyChains-NG
$ sudo vim /etc/proxychains.conf
文件末尾,编辑如下:
- socks4 	127.0.0.1 	9050
+ socks5 	127.0.0.1 	9050
然后,在命令前加上 proxychains 即可,如:
$ proxychains wget google.com && rm index.html
#卸载软件
GNOME 有时可能会自动运行一些占 CPU 和 内存的服务,用不着,故卸载。
$ sudo pacman -Rs gnome-software gnome-calendar gnome-documents gnome-todo gnome-maps gnome-contacts evolution
其中,卸载 gnome-calender 是因为它依赖 Evolution,而 Evolution 有自动运行的进程,gnome-calender 也用不着,故一同卸载。
另外,还有叫 Tracker 的,它是个 GNOME 的文件索引生成软件,这样搜索时会更快,不该卸载。
#安装字体
字体是最影响阅读体验的一方面,而它的重要性却常常被忽视。
$ sudo pacman -S ttf-dejavu ttf-liberation ttf-roboto ttf-inconsolata ttf-linux-libertine ttf-droid noto-fonts noto-fonts-extra noto-fonts-emoji noto-fonts-cjk adobe-source-han-sans-cn-fonts adobe-source-han-serif-cn-fonts
$ yay -S otf-eb-garamond ttf-monaco otf-san-francisco consolas-font
Adobe Garamond:https://fontlot.com/15206/adobe-garamond/
Menlo:https://github.com/ueaner/fonts
最后,请务必安装 STShusong、STFangsong、STKaiti,自行搜索下载相应的 ttf 文件。安装很简单,下载后,GNOME 下鼠标左键单击即可安装。另:
- 命令行安装的字体所在的目录:
/usr/share/fonts/ - 手动安装的字体所在的目录:
~/.local/share/fonts/
#配置字体
字体的选择是非常重要的,选择一个好字体,能够极大地提高效率。
$ mkdir ~/.config/fontconfig
$ vim ~/.config/fontconfig/fonts.conf
加入:
<?xml version='1.0'?>
<!DOCTYPE fontconfig SYSTEM 'fonts.dtd'>
<fontconfig>

  <alias>
    <family>sans-serif</family>
    <prefer>
      <family>Linux Biolinum O</family>
      <family>STShusong</family>
      <family>Source Han Serif CN</family>
      <family>Source Han Sans CN</family>
      <family>Noto Sans CJK TC</family>
      <family>Noto Sans CJK JP</family>
      <family>Noto Sans CJK KR</family>
      <family>Noto Sans</family>
      <family>Noto Color Emoji</family>
    </prefer>
  </alias>

  <alias>
    <family>serif</family>
    <prefer>
      <family>Adobe Garamond</family>
      <family>STShusong</family>
      <family>Source Han Serif CN</family>
      <family>Noto Serif CJK TC</family>
      <family>Noto Serif CJK JP</family>
      <family>Noto Serif CJK KR</family>
      <family>Noto Serif</family>
      <family>Noto Color Emoji</family>
    </prefer>
  </alias>

  <alias>
    <family>monospace</family>
    <prefer>
      <family>Menlo</family>
      <family>STShusong</family>
      <family>Source Han Serif CN</family>
      <family>Source Han Sans CN</family>
      <family>Noto Sans CJK TC</family>
      <family>Noto Sans CJK JP</family>
      <family>Noto Sans CJK KR</family>
      <family>Noto Sans</family>
      <family>Noto Color Emoji</family>
    </prefer>
  </alias>

  <dir>~/.local/share/fonts</dir>
</fontconfig>
更新字体缓存以生效(部分软件需重启软件才能生效):
$ fc-cache -fv
当然,上面是我的个人配置,可依个人审美自行修改。
另,附上我的 Tweaks 的配置:
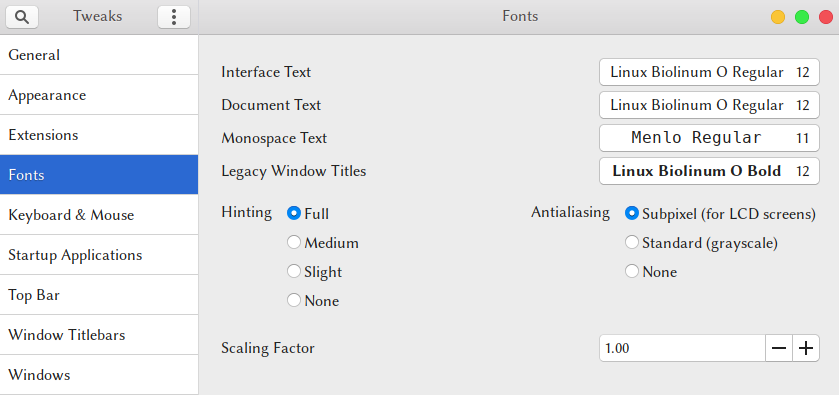
以及我的 Google Chrome 的配置:
| 选项 | 配置 |
|---|---|
| Font size | 18 |
| Standard font | Linux Biolinum O |
| Serif font | Adobe Garamond |
| Sans-serif font | Linux Biolinum O |
| Fixed-width font | Menlo |
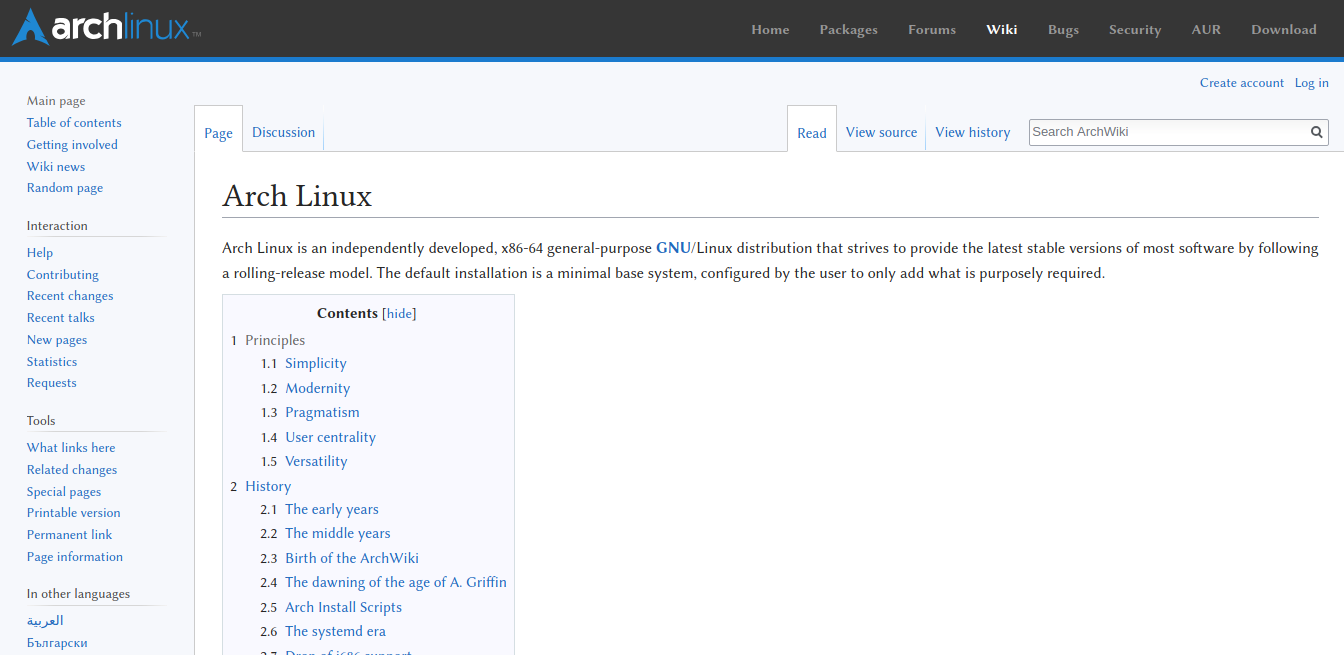 ※ 按以上配置的英文 Arch Wiki 页面显示效果
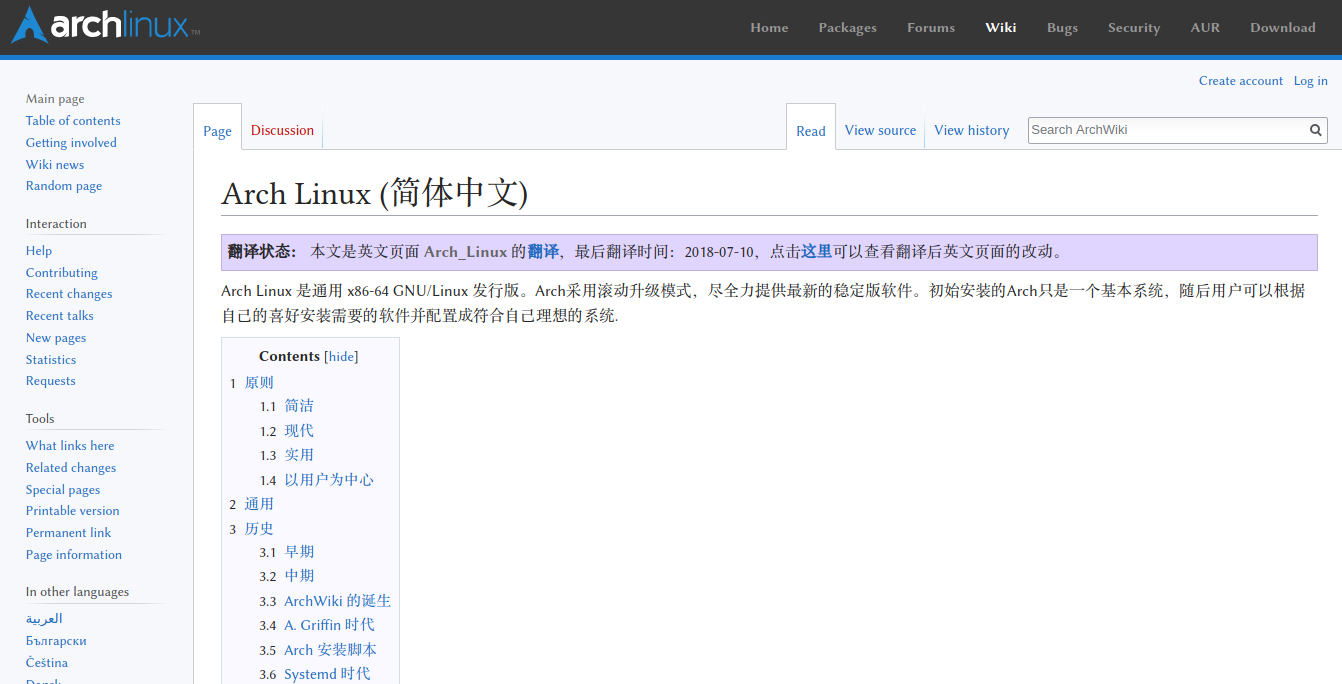 ※ 按以上配置的中文 Arch Wiki 页面显示效果
https://wiki.archlinux.org/index.php/Fonts
https://www.freedesktop.org/software/fontconfig/fontconfig-user.html
https://wiki.archlinux.org/index.php/Font_configuration
#透明终端
$ yay -S gnome-terminal-transparency
#颜色配置
一些必要的色彩区分能够极大提高效率。
#终端颜色(Bash)
先备份文件:
$ sudo cp /etc/bash.bashrc /etc/bash.bashrc.backup
然后新建:
$ sudo vim /etc/bash.bashrc
# /etc/bash.bashrc
#
# https://wiki.archlinux.org/index.php/Color_Bash_Prompt
#
# This file is sourced by all *interactive* bash shells on startup,
# including some apparently interactive shells such as scp and rcp
# that can't tolerate any output. So make sure this doesn't display
# anything or bad things will happen !

# Test for an interactive shell. There is no need to set anything
# past this point for scp and rcp, and it's important to refrain from
# outputting anything in those cases.

# If not running interactively, don't do anything!
[[ $- != *i* ]] && return

# Bash won't get SIGWINCH if another process is in the foreground.
# Enable checkwinsize so that bash will check the terminal size when
# it regains control.
# http://cnswww.cns.cwru.edu/~chet/bash/FAQ (E11)
shopt -s checkwinsize

# Enable history appending instead of overwriting.
shopt -s histappend

case ${TERM} in
  xterm*|rxvt*|Eterm|aterm|kterm|gnome*)
    PROMPT_COMMAND=${PROMPT_COMMAND:+$PROMPT_COMMAND; }'printf "\033]0;%s@%s:%s\007" "${USER}" "${HOSTNAME%%.*}" "${PWD/#$HOME/~}"'
    ;;
  screen)
    PROMPT_COMMAND=${PROMPT_COMMAND:+$PROMPT_COMMAND; }'printf "\033_%s@%s:%s\033\\" "${USER}" "${HOSTNAME%%.*}" "${PWD/#$HOME/~}"'
    ;;
esac

# fortune is a simple program that displays a pseudorandom message
# from a database of quotations at logon and/or logout.
# If you wish to use it, please install "fortune-mod" from the
# official repositories, then uncomment the following line:

# [[ "$PS1" ]] && /usr/bin/fortune

# Set colorful PS1 only on colorful terminals.
# dircolors --print-database uses its own built-in database
# instead of using /etc/DIR_COLORS. Try to use the external file
# first to take advantage of user additions. Use internal bash
# globbing instead of external grep binary.

# sanitize TERM:
safe_term=${TERM//[^[:alnum:]]/?}
match_lhs=""

[[ -f ~/.dir_colors ]] && match_lhs="${match_lhs}$(<~/.dir_colors)"
[[ -f /etc/DIR_COLORS ]] && match_lhs="${match_lhs}$(</etc/DIR_COLORS)"
[[ -z ${match_lhs} ]] \
  && type -P dircolors >/dev/null \
  && match_lhs=$(dircolors --print-database)

if [[ $'\n'${match_lhs} == *$'\n'"TERM "${safe_term}* ]] ; then

  # we have colors :-)

  # Enable colors for ls, etc. Prefer ~/.dir_colors
  if type -P dircolors >/dev/null ; then
    if [[ -f ~/.dir_colors ]] ; then
      eval $(dircolors -b ~/.dir_colors)
    elif [[ -f /etc/DIR_COLORS ]] ; then
      eval $(dircolors -b /etc/DIR_COLORS)
    fi
  fi

  PS1="$(if [[ ${EUID} == 0 ]]; then echo '\[\033[01;31m\]\h'; else echo '\[\033[01;32m\]\u@\h'; fi)\[\033[01;34m\] \w \$([[ \$? != 0 ]] && echo \"\[\033[01;31m\]:(\[\033[01;34m\] \")\\$\[\033[00m\] "

  # Use this other PS1 string if you want \W for root and \w for all other users:
  # PS1="$(if [[ ${EUID} == 0 ]]; then echo '\[\033[01;31m\]\h\[\033[01;34m\] \W'; else echo '\[\033[01;32m\]\u@\h\[\033[01;34m\] \w'; fi) \$([[ \$? != 0 ]] && echo \"\[\033[01;31m\]:(\[\033[01;34m\] \")\\$\[\033[00m\] "

  alias ls="ls --color=auto"
  alias dir="dir --color=auto"
  alias grep="grep --color=auto"
  alias dmesg='dmesg --color'

  # Uncomment the "Color" line in /etc/pacman.conf instead of uncommenting the following line...!

  # alias pacman="pacman --color=auto"

else

  # show root@ when we do not have colors

  PS1="\u@\h \w \$([[ \$? != 0 ]] && echo \":( \")\$ "

  # Use this other PS1 string if you want \W for root and \w for all other users:
  # PS1="\u@\h $(if [[ ${EUID} == 0 ]]; then echo '\W'; else echo '\w'; fi) \$([[ \$? != 0 ]] && echo \":( \")\$ "

fi

PS2="> "
PS3="> "
PS4="+ "

# Try to keep environment pollution down, EPA loves us.
unset safe_term match_lhs

# Try to enable the auto-completion (type: "pacman -S bash-completion" to install it).
[ -r /usr/share/bash-completion/bash_completion ] && . /usr/share/bash-completion/bash_completion

# Try to enable the "Command not found" hook ("pacman -S pkgfile" to install it).
# See also: https://wiki.archlinux.org/index.php/Bash#The_.22command_not_found.22_hook
[ -r /usr/share/doc/pkgfile/command-not-found.bash ] && . /usr/share/doc/pkgfile/command-not-found.bash

man() {
    env LESS_TERMCAP_mb=$'\E[01;31m' \
    LESS_TERMCAP_md=$'\E[01;38;5;74m' \
    LESS_TERMCAP_me=$'\E[0m' \
    LESS_TERMCAP_se=$'\E[0m' \
    LESS_TERMCAP_so=$'\E[38;5;246m' \
    LESS_TERMCAP_ue=$'\E[0m' \
    LESS_TERMCAP_us=$'\E[04;38;5;146m' \
    man "$@"
}
再新建:
$ sudo vim /etc/DIR_COLORS
# Configuration file for the color ls utility
# This file goes in the /etc directory, and must be world readable.
# You can copy this file to .dir_colors in your $HOME directory to override
# the system defaults.

# COLOR needs one of these arguments: 'tty' colorizes output to ttys, but not
# pipes. 'all' adds color characters to all output. 'none' shuts colorization
# off.
COLOR all

# Extra command line options for ls go here.
# Basically these ones are:
#  -F = show '/' for dirs, '*' for executables, etc.
#  -T 0 = don't trust tab spacing when formatting ls output.
OPTIONS -F -T 0

# Below, there should be one TERM entry for each termtype that is colorizable
TERM linux
TERM console
TERM con132x25
TERM con132x30
TERM con132x43
TERM con132x60
TERM con80x25
TERM con80x28
TERM con80x30
TERM con80x43
TERM con80x50
TERM con80x60
TERM xterm
TERM xterm-color
TERM xterm-256color
TERM vt100
TERM rxvt
TERM rxvt-256color
TERM rxvt-cygwin
TERM rxvt-cygwin-native
TERM rxvt-unicode
TERM rxvt-unicode-256color
TERM rxvt-unicode256
TERM screen

# EIGHTBIT, followed by '1' for on, '0' for off. (8-bit output)
EIGHTBIT 1

# Below are the color init strings for the basic file types. A color init
# string consists of one or more of the following numeric codes:
# Attribute codes:
# 00=none 01=bold 04=underscore 05=blink 07=reverse 08=concealed
# Text color codes:
# 30=black 31=red 32=green 33=yellow 34=blue 35=magenta 36=cyan 37=white
# Background color codes:
# 40=black 41=red 42=green 43=yellow 44=blue 45=magenta 46=cyan 47=white
NORMAL 00 # global default, although everything should be something.
FILE 00   # normal file
DIR 01;34   # directory
LINK 01;36  # symbolic link
FIFO 40;33  # pipe
SOCK 01;35  # socket
BLK 40;33;01  # block device driver
CHR 40;33;01  # character device driver

# This is for files with execute permission:
EXEC 01;32

# List any file extensions like '.gz' or '.tar' that you would like ls
# to colorize below. Put the extension, a space, and the color init string.
# (and any comments you want to add after a '#')
.cmd 01;32 # executables (bright green)
.exe 01;32
.com 01;32
.btm 01;32
.bat 01;32
.tar 01;31 # archives or compressed (bright red)
.tgz 01;31
.arj 01;31
.taz 01;31
.lzh 01;31
.zip 01;31
.z   01;31
.Z   01;31
.gz  01;31
.jpg 01;35 # image formats
.gif 01;35
.bmp 01;35
.xbm 01;35
.xpm 01;35
.tif 01;35
保存后重启终端即可见效果。
https://www.youtube.com/watch?v=giAb4Ckh8BQ
#Pacman 的颜色
$ sudo sed -i 's/#Color/Color/g' /etc/pacman.conf
#游戏游戏
Linux 下也能玩游戏!
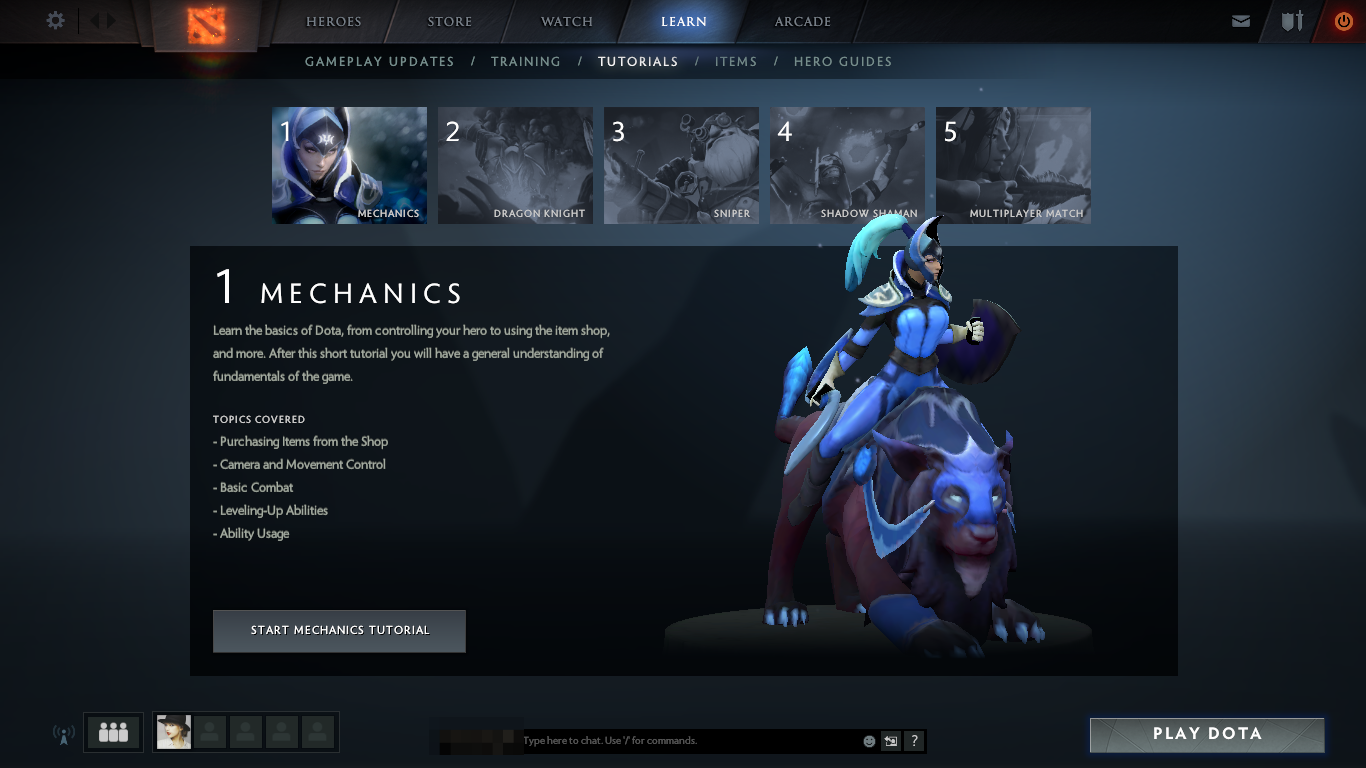 ※ 在 Arch Linux 上玩 Dota2
https://wiki.archlinux.org/index.php/Gaming
https://itsfoss.com/free-linux-games/
https://www.gamingonlinux.com/
#原生
1)Urban Terror
类似 CS 的第一人称射击类游戏。
$ yay -S urbanterror
2)Xonotic
有毒的第一人称射击类游戏。
$ sudo pacman -S xonotic
 ※ 联机时网络延迟过高,跟老外说再见
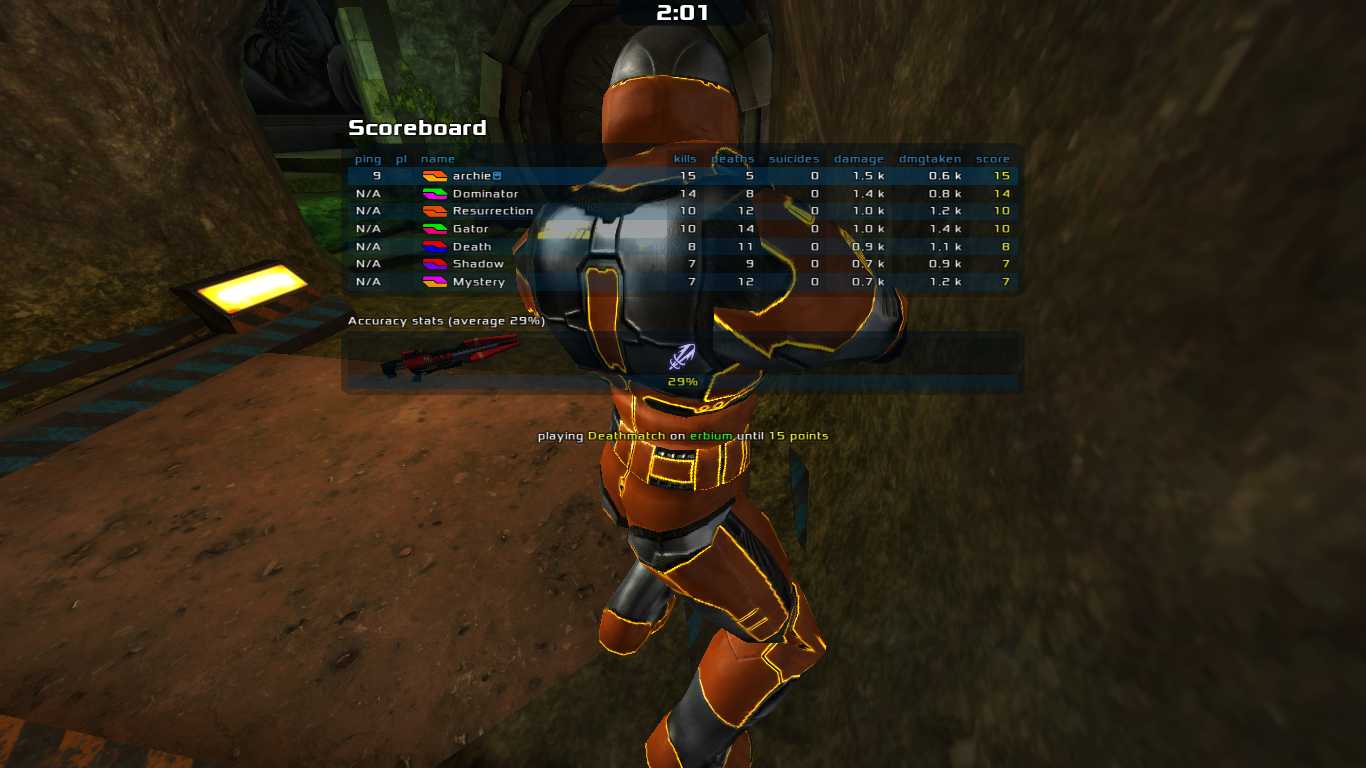 ※ 单机 15 杀
3)Super Tux Kart
有故事的飞车类游戏。
$ sudo pacman -S supertuxkart
#Steam
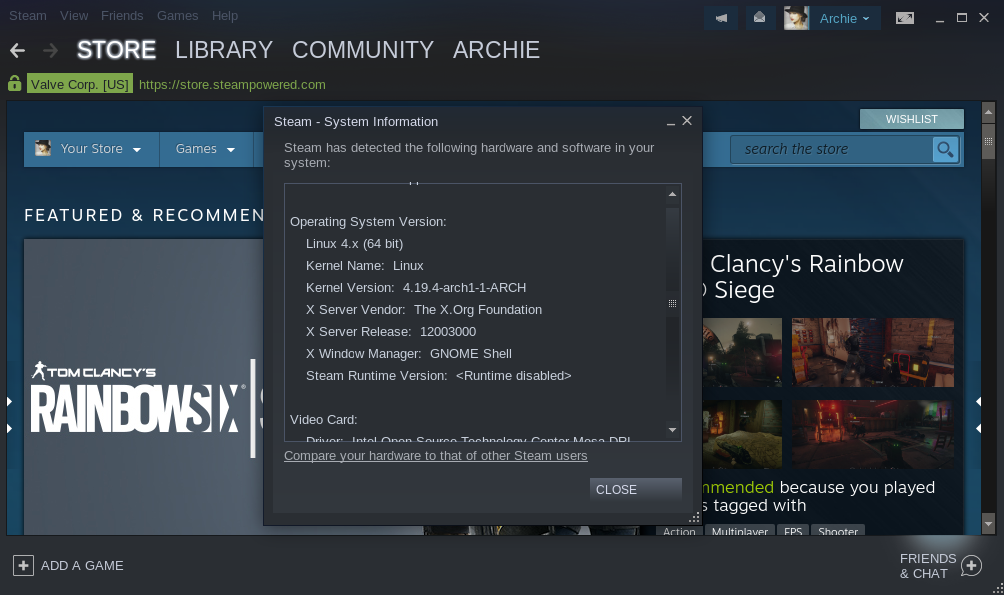 ※ 运行在 Arch Linux 上的 Steam
添加源:
$ sudo vim /etc/pacman.conf
删除下面两行的 # 注释符:
[multilib]
Include = /etc/pacman.d/mirrorlist
安装:
$ sudo pacman -Syu
$ sudo pacman -S steam steam-native-runtime
选择 Steam (Native) 启动,建议运行测试版,及时体验最新功能。在菜单栏 Steam > Settings > Account > Beta participation 开启后保存即可。
目前 Steam 也有一些原生支持的游戏,可玩的有:
- Dota2
- Counter-Strike
- Star Conflict
- Tank Force
- AV-17
此外,今年八月,Linux 下的 Steam 支持使用 Steam Play 来玩 Windows 下的游戏,设置中勾选 Proton 即可。
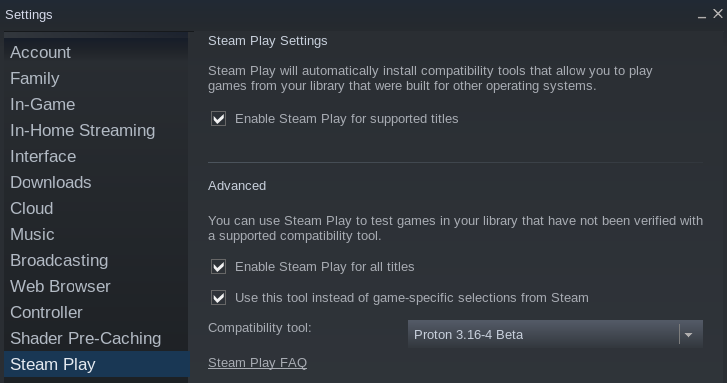 ※ Steam Play 设置
但是,目前并不是每个游戏都能支持,比如吃鸡就不行。
支持状态可看:https://www.protondb.com/
https://wiki.archlinux.org/index.php/Steam
https://wiki.archlinux.org/index.php/Official_repositories#multilib
https://www.reddit.com/r/archlinux/comments/8dgj8e/steam_is_missing_multipile_32bit_libraries/
#Lutris
一个游戏管理软件,也提供 Linux 下游戏的解决方案,如:Fortnite、League of Legends、World of Warcraft、Overwatch 等等。
$ sudo pacman -S lutris
#启动界面
开机不仅要快,还要好看,还要够 Cool~
#更换 LightDM 的主题
 ※ 开机登录界面
$ sudo pacman -S lightdm-webkit2-greeter
$ yay -S lightdm-webkit2-theme-material2
编辑文件:
$ sudo vim /etc/lightdm/lightdm.conf
找到下面这行,更改为:
-#greeter-session=example-gtk-gnome
+greeter-session=lightdm-webkit2-greeter
编辑文件:
$ sudo vim /etc/lightdm/lightdm-webkit2-greeter.conf
找到下面这行,更改为:
[greeter]
-  webkit_theme        = antergos
+  webkit_theme        = material2
https://github.com/FallingSnow/lightdm-webkit2-material2/wiki/Installation
https://wiki.archlinux.org/index.php/LightDM
#隐藏 GRUB 除非按下 shift 键
新建文件:
$ sudo vim /etc/grub.d/31_hold_shift
加入:
# 来源:https://gist.githubusercontent.com/anonymous/8eb2019db2e278ba99be/raw/257f15100fd46aeeb8e33a7629b209d0a14b9975/gistfile1.sh

#! /bin/sh
set -e

prefix="/usr"
exec_prefix="${prefix}"
datarootdir="${prefix}/share"

export TEXTDOMAIN=grub
export TEXTDOMAINDIR="${datarootdir}/locale"
source "${datarootdir}/grub/grub-mkconfig_lib"

found_other_os=

make_timeout () {

  if [ "x${GRUB_FORCE_HIDDEN_MENU}" = "xtrue" ] ; then
    if [ "x${1}" != "x" ] ; then
      if [ "x${GRUB_HIDDEN_TIMEOUT_QUIET}" = "xtrue" ] ; then
    verbose=
      else
    verbose=" --verbose"
      fi

      if [ "x${1}" = "x0" ] ; then
    cat <<EOF
if [ "x\${timeout}" != "x-1" ]; then
  if keystatus; then
    if keystatus --shift; then
      set timeout=-1
    else
      set timeout=0
    fi
  else
    if sleep$verbose --interruptible 3 ; then
      set timeout=0
    fi
  fi
fi
EOF
      else
    cat << EOF
if [ "x\${timeout}" != "x-1" ]; then
  if sleep$verbose --interruptible ${GRUB_HIDDEN_TIMEOUT} ; then
    set timeout=0
  fi
fi
EOF
      fi
    fi
  fi
}

adjust_timeout () {
  if [ "x$GRUB_BUTTON_CMOS_ADDRESS" != "x" ]; then
    cat <<EOF
if cmostest $GRUB_BUTTON_CMOS_ADDRESS ; then
EOF
    make_timeout "${GRUB_HIDDEN_TIMEOUT_BUTTON}" "${GRUB_TIMEOUT_BUTTON}"
    echo else
    make_timeout "${GRUB_HIDDEN_TIMEOUT}" "${GRUB_TIMEOUT}"
    echo fi
  else
    make_timeout "${GRUB_HIDDEN_TIMEOUT}" "${GRUB_TIMEOUT}"
  fi
}

  adjust_timeout

    cat <<EOF
if [ "x\${timeout}" != "x-1" ]; then
  if keystatus; then
    if keystatus --shift; then
      set timeout=-1
    else
      set timeout=0
    fi
  else
    if sleep$verbose --interruptible 3 ; then
      set timeout=0
    fi
  fi
fi
EOF
保存后,添加可执行权限并编辑 GRUB:
$ sudo chmod a+x /etc/grub.d/31_hold_shift
$ sudo vim /etc/default/grub
在最后加入一行:
GRUB_FORCE_HIDDEN_MENU="true"
生成 GRUB 配置文件:
$ sudo grub-mkconfig -o /boot/grub/grub.cfg
#开关机显示内核输出信息
$ sudo vim /etc/default/grub
更改为:
GRUB_CMDLINE_LINUX_DEFAULT="... splash"
生成 GRUB 配置文件:
$ sudo grub-mkconfig -o /boot/grub/grub.cfg
#其它细节
- Gedit 的实用插件
- 更改 Fcitx Pinyin 的托盘图标
- 更改 Steam 的托盘图标
- GNOME Shell Extensions 的配置
https://github.com/ValveSoftware/steam-for-linux/issues/3887
#参考资源
只要有 Google,一切软件问题皆可解决。
#视频
Dual Booting Windows 10 and Arch Linux on UEFI
Full Arch Linux Install (SAVAGE Edition!) | YouTube
After a Minimal Linux Install: Graphical Envionment and Users | YouTube
Arch Linux UEFI step-by-step installation guide | YouTube
10 Things to do first in Arch Linux | YouTube
#文章
https://wiki.archlinux.org/index.php/Installation_guide
https://wiki.archlinux.org/index.php/General_recommendations
https://www.viseator.com/tags/Arch/
https://github.com/typefo/blog/blob/master/linux/archlinux-install-guide-uefi.md
https://blog.allenchou.cc/arch-linux-tutorial/
https://linux.cn/article-9170-1.html