 ※ HTTPS
购买域名就不说了,如果想省去备案的麻烦,就不要到国内的域名服务商注册,选择一些国外的大公司,比如 GoDaddy。
#配置 DNS
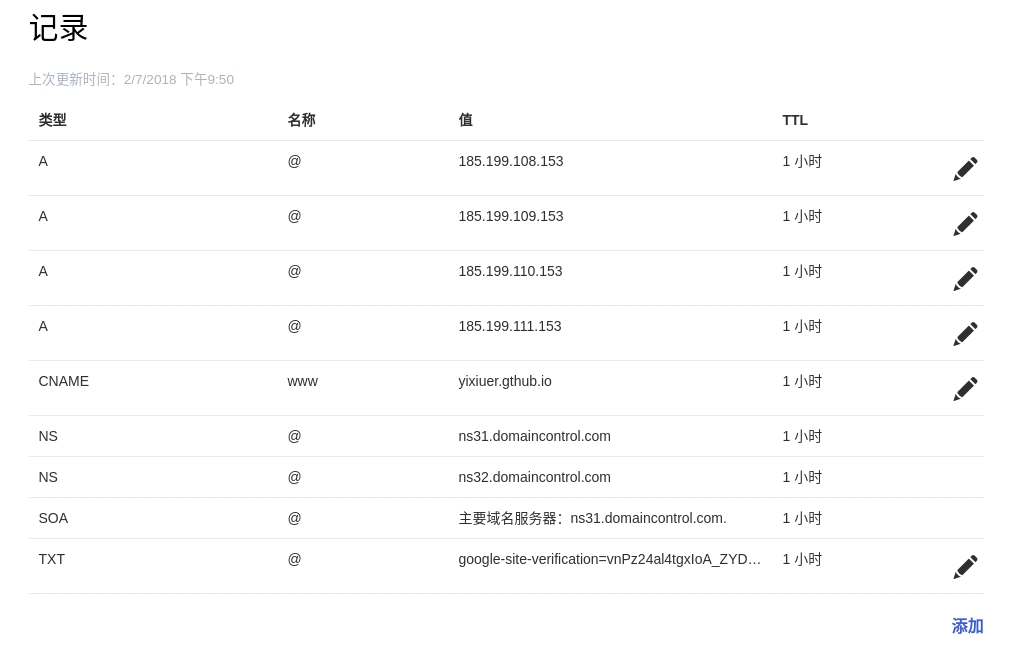
这里以 GoDaddy 为例,添加 4 个 A 记录和 1 个 CNAME:[1]
| 类型 | 名称 | 值 |
|---|---|---|
| A | @ | 185.199.108.153 |
| A | @ | 185.199.109.153 |
| A | @ | 185.199.110.153 |
| A | @ | 185.199.111.153 |
| CNAME | www | yixiuer.github.io |
建议将默认添加的几行删除,以免产生解析错误,可以参考我的,上面的 5 行即我自行添加的:
怎么查看域名是否已经解析成功了呢?[2]
$ dig +noall +answer example.com
;example.com.
example.com.   3600  IN  A 185.199.108.153
example.com.   3600  IN  A 185.199.109.153
example.com.   3600  IN  A 185.199.110.153
example.com.   3600  IN  A 185.199.111.153
Linux 下输入以上命令,得到以上结果即表明域名解析成功,可以进入下一步了。
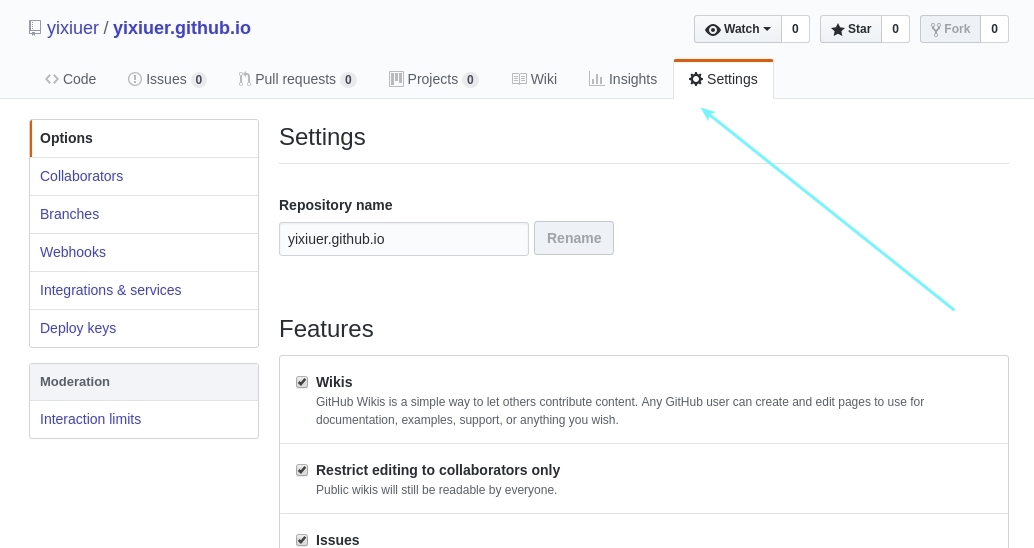
#Custom domain
稍等一会等域名解析生效,接下来去 GitHub 配置:
滚动鼠标,页面下拉,找到下面内容:
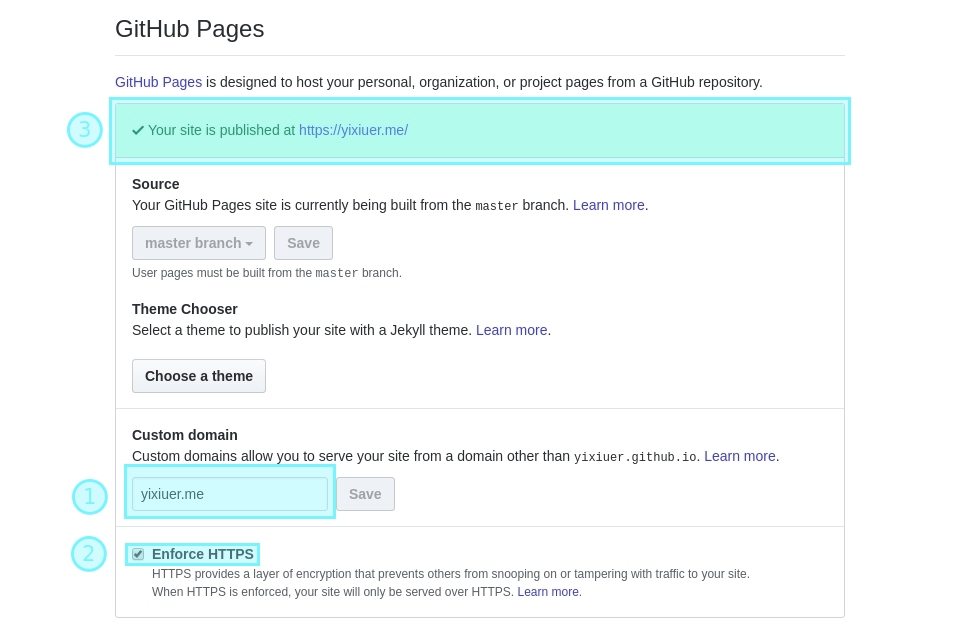
在①填入你注册的域名后 Save,等待几小时生成证书,然后在②处勾选 Enforce HTTPS,相关信息会在页面加载后不久显示在③处,部署成功就会显示为我的截图中相关内容。
#博客相关配置
在等待证书生成的时候就可以配置下博客,首先添加 CNAME 文件:
yixiuer.me
文件位置:~/blog/source/CNAME(Hexo);~/blog/static/CNAME(Hugo)。
注意没有文件扩展名,如果你是在 Windows 下用记事本新建的,请设置后将扩展名删除。
Hexo 中,然后修改站点配置文件:
# 文件位置:~/blog/_config.yml

# URL
## If your site is put in a subdirectory, set url as 'http://yoursite.com/child' and root as '/child/'
- url: https://yixiuer.github.io/
+ url: https://yixiuer.me/
记得 hexo d 更新博客,最后只需静候证书生成就 OK 啦🍻~
另外,根据 The GitHub Blog 的相关内容[3]:
These new IP addresses don’t just allow us to serve your site over HTTPS, but also places your site behind a content delivery network (CDN), allowing us to serve your site from data centers around the world at fast speeds, and offering additional protection against DDoS attacks. While the previous IP addresses will remain available for a transition period, we recommend you migrate to the new IP addresses to gain these benefits.
如果你之前配置过 DNS,用的还是老的 IP 地址,现在快点将你的 A 记录中的 IP 值更改为新的吧!