[1] ※ PWA
※ PWA
如果你使用 Google Chrome 浏览器访问我的博客💻,你可能会发现地址栏右侧有一个小小的 + 号,并会提醒你安装。当然,如果你是用手机访问的话📱,Chrome 就会在页面的底部提醒你。但你可千万千万不要把它当作什么恶意骚扰哦😅,它只是善意地提醒你:这个网站是一个 PWA 站点,强烈推荐您添加到桌面以获取原生应用般的优质体验!😝
注意:请查看一个简单的 Service Worker。
#前言
渐进式网络应用程序(英语:Progressive Web Apps,简称:PWA)是一种运用现代的 Web API 以及传统的渐进式增强策略创建的跨平台 Web 应用程序。这种应用程序将目前最为现代化的浏览器提供的功能与移动设备的体验优势相结合,使其具有与原生应用相同的用户体验优势。[2]
以上是开发者角度,就用户角度来说🐼,当你的博客实现 PWA 后,你的读者可以:
- 添加你的博客到电脑╱手机的桌面,以原生应用般的方式浏览你的博客
- 更快速地浏览你的博客
- 离线浏览你的博客
第一点:对于读者,博客可一触即达,且无浏览器的地址栏、菜单栏等「无关」干扰👴;对于博客,非常有利于博客的用户留存率,也利于博客的品牌形象😺。第二点:可以利用 Service Worker 的缓存特点,极大地加速你的博客,如果再加上 InstantClick 的预加载特点,简直飞速🚀。第三点:对博客来说,个人感觉意义不大🤔。
#正文
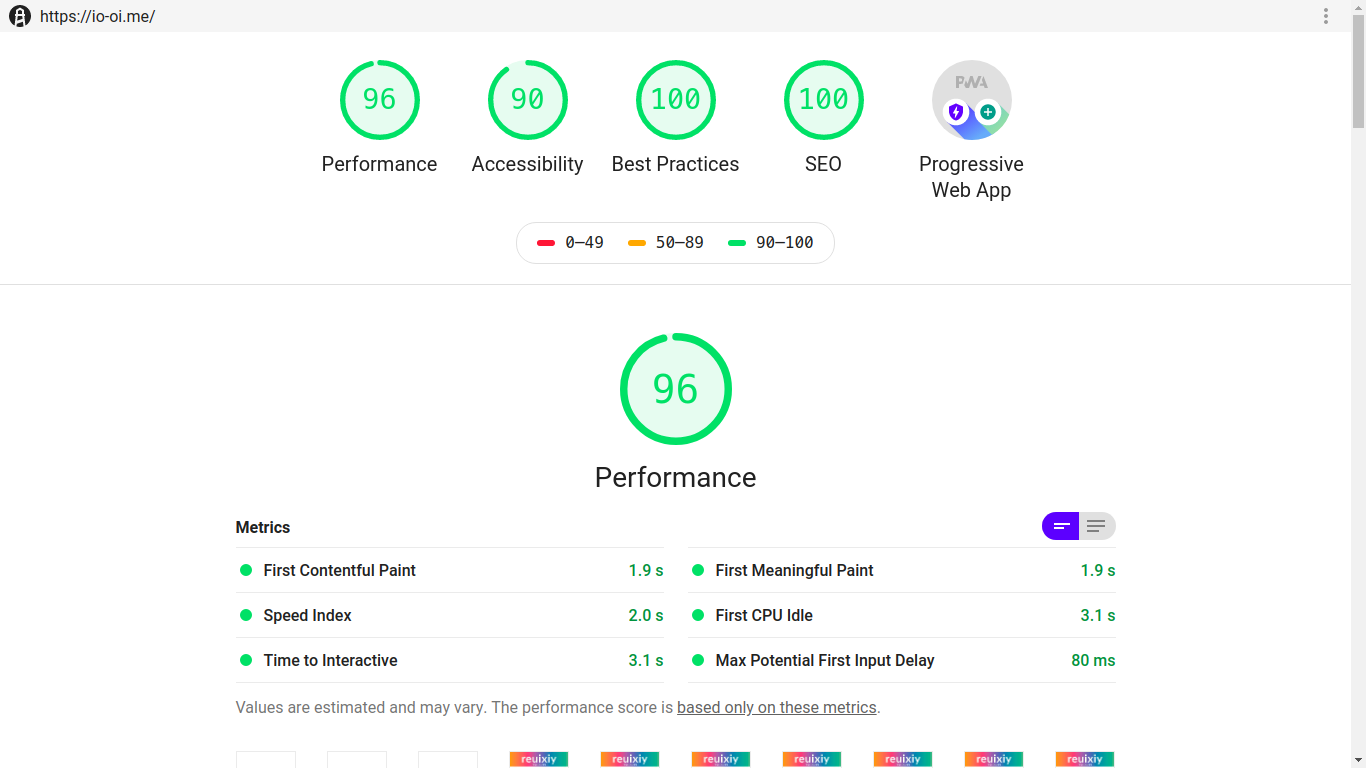
PWA 有很多要求,比如:HTTPS、响应式布局等等,可参考这个 Checklist,可用 Lighthouse[3] 检查。
[4] ※ 本站首页的 Lighthouse 测试报告
关于图标和 manifest.json,可以通过这个网站在线生成。如果你不确定,可以参考我的博客以及 MemE 主题的相关代码。
在 PWA 的众多要求中,其中很重要的一点就是可离线访问,而要实现这一点,最简单的方法就是使用 Service Worker。在这篇文章中,我们使用 Workbox 这个工具生成 sw.js 以快速实现 Service Worker 🤖,并实现页面的预缓存和页面更新后的提醒功能,而非深究 Service Worker 的接口然后手动写 JS 代码来实现👨💻🐶...
由于我们需要使用 Node 的模块,因此我们的电脑必须安装 Node.js。如果你使用的是 Hexo,那么是已经安装过的;如果你使用的是 Hugo,那么请自行安装一下。然后,我们安装模块📦:
~/blog $ npm install workbox-build gulp gulp-uglify readable-stream uglify-es --save-dev
如何将安装的模块更新到最新版本呢?
~/blog $ npm update如果不生效,可继续尝试(下方以
workbox-build为例):~/blog $ npm outdated Package Current Wanted Latest Location workbox-build 4.3.1 4.3.1 5.0.0 blog ~/blog $ npm install workbox-build@latesthttps://bytearcher.com/articles/using-npm-update-and-npm-outdated-to-update-dependencies/
接下来,我们在博客文件夹下新建一个 gulpfile.js 文件:
const gulp = require("gulp");
const workbox = require("workbox-build");
const uglifyes = require('uglify-es');
const composer = require('gulp-uglify/composer');
const uglify = composer(uglifyes, console);
const pipeline = require('readable-stream').pipeline;

gulp.task('generate-service-worker', () => {
    return workbox.injectManifest({
        swSrc: './sw-template.js',
        swDest: './public/sw.js',
        globDirectory: './public',
        globPatterns: [
            "**/*.{html,css,js,json,woff2}"
        ],
        modifyURLPrefix: {
            "": "./"
        }
    });
});

gulp.task("uglify", function () {
    return pipeline(
        gulp.src("./public/sw.js"),
        uglify(),
        gulp.dest("./public")
    );
});

gulp.task("build", gulp.series("generate-service-worker", "uglify"));
其中,globPatterns 就是生成的预缓存列表的文件匹配模式,在这里就是将所有的 html、css、js、json、woff2 文件预缓存,即博客首次加载时,自动将这些文件缓存。
然后,再新建一个 sw-template.js 文件:
const workboxVersion = '5.0.0';

importScripts(`https://storage.googleapis.com/workbox-cdn/releases/${workboxVersion}/workbox-sw.js`);

workbox.core.setCacheNameDetails({
    prefix: "reuixiy"
});

workbox.core.skipWaiting();

workbox.core.clientsClaim();

workbox.precaching.precacheAndRoute(self.__WB_MANIFEST);

workbox.precaching.cleanupOutdatedCaches();

// Images
workbox.routing.registerRoute(
    /\.(?:png|jpg|jpeg|gif|bmp|webp|svg|ico)$/,
    new workbox.strategies.CacheFirst({
        cacheName: "images",
        plugins: [
            new workbox.expiration.ExpirationPlugin({
                maxEntries: 1000,
                maxAgeSeconds: 60 * 60 * 24 * 30
            }),
            new workbox.cacheableResponse.CacheableResponsePlugin({
                statuses: [0, 200]
            })
        ]
    })
);

// Fonts
workbox.routing.registerRoute(
    /\.(?:eot|ttf|woff|woff2)$/,
    new workbox.strategies.CacheFirst({
        cacheName: "fonts",
        plugins: [
            new workbox.expiration.ExpirationPlugin({
                maxEntries: 1000,
                maxAgeSeconds: 60 * 60 * 24 * 30
            }),
            new workbox.cacheableResponse.CacheableResponsePlugin({
                statuses: [0, 200]
            })
        ]
    })
);

// Google Fonts
workbox.routing.registerRoute(
    /^https:\/\/fonts\.googleapis\.com/,
    new workbox.strategies.StaleWhileRevalidate({
        cacheName: "google-fonts-stylesheets"
    })
);
workbox.routing.registerRoute(
    /^https:\/\/fonts\.gstatic\.com/,
    new workbox.strategies.CacheFirst({
        cacheName: 'google-fonts-webfonts',
        plugins: [
            new workbox.expiration.ExpirationPlugin({
                maxEntries: 1000,
                maxAgeSeconds: 60 * 60 * 24 * 30
            }),
            new workbox.cacheableResponse.CacheableResponsePlugin({
                statuses: [0, 200]
            })
        ]
    })
);

// Static Libraries
workbox.routing.registerRoute(
    /^https:\/\/cdn\.jsdelivr\.net/,
    new workbox.strategies.CacheFirst({
        cacheName: "static-libs",
        plugins: [
            new workbox.expiration.ExpirationPlugin({
                maxEntries: 1000,
                maxAgeSeconds: 60 * 60 * 24 * 30
            }),
            new workbox.cacheableResponse.CacheableResponsePlugin({
                statuses: [0, 200]
            })
        ]
    })
);

// External Images
workbox.routing.registerRoute(
    /^https:\/\/raw\.githubusercontent\.com\/reuixiy\/hugo-theme-meme\/master\/static\/icons\/.*/,
    new workbox.strategies.CacheFirst({
        cacheName: "external-images",
        plugins: [
            new workbox.expiration.ExpirationPlugin({
                maxEntries: 1000,
                maxAgeSeconds: 60 * 60 * 24 * 30
            }),
            new workbox.cacheableResponse.CacheableResponsePlugin({
                statuses: [0, 200]
            })
        ]
    })
);

workbox.googleAnalytics.initialize();
其中,请将 prefix 修改为你博客的名字(英文),请查看 Workbox 的 Releases 页面并务必视版本说明修改 workboxVersion 为最新版,其它项也请务必结合你的情况自行修改。如果你想用其它缓存策略,请自行查看相关文档。同时,提醒一下,绝对不要缓存视频或者预缓存图片。
本地测试一下:
~/blog $ ./node_modules/gulp/bin/gulp.js build
你可以手动检查一下生成的 sw.js 文件(在 public 文件夹内)。当然,你也可以本地 F12 调试一下,Hugo 的话 hugo server -D --renderToDisk --environment production,Hexo 的话直接 hexo s。
生成 sw.js 文件后,还没结束哦,我们还要在 HTML 页面中加入相关代码以注册 Service Worker,并添加页面更新后的提醒功能。在这里可能要编辑你的主题相关模板文件,把以下代码放在 </body> 的前面:
<div class="app-refresh" id="app-refresh">
    <div class="app-refresh-wrap" onclick="location.reload()">
        <label>已更新最新版本</label>
        <span>点击刷新</span>
    </div>
</div>

<script>
    if ('serviceWorker' in navigator) {
        if (navigator.serviceWorker.controller) {
            navigator.serviceWorker.addEventListener('controllerchange', function() {
                showNotification();
            });
        }

        window.addEventListener('load', function() {
            navigator.serviceWorker.register('/sw.js');
        });
    }

    function showNotification() {
        document.querySelector('meta[name=theme-color]').content = '#000';
        document.getElementById('app-refresh').className += ' app-refresh-show';
    }
</script>
再添加以下 CSS 样式到你的 custom.styl:
.app-refresh {
    background: #000;
    height: 0;
    line-height: 3em;
    overflow: hidden;
    position: fixed;
    top: 0;
    left: 0;
    right: 0;
    z-index: 42;
    padding: 0 1em;
    transition: all .3s ease;
}
.app-refresh-wrap {
    display: flex;
    color: #fff;
}
.app-refresh-wrap label {
    flex: 1;
}
.app-refresh-show {
    height: 3em;
}
你可以修改一下你的某篇文章,然后再次生成 sw.js,最后浏览器刷新一下测试一下。
这种方法是适合各种静态博客的😎,不管你的 SSG[5] 是 Hugo,或是 Hexo,还是其它。另外,Hugo 的 MemE 主题是支持 Service Worker 这个功能的,因为以上内容其实就是我在开发该主题时摸索出来🐶。最后,如果你对自动化的持续集成部署有疑惑,可以参考我的博客源码以及我之前写的一篇文章。
#References & Resources
Workbox:
- Service Workers With Workbox In A Hugo Static Generated Site | The Polyglot Developer
- Using Custom Workbox Service Workers with Create-React-App (without ejecting) | Karan NA Gupta
- Workbox, not sw-toolbox & sw-precache | Sukka’s Blog
- Precache Files with workbox-build | Workbox | Google Developers
- Common Recipes | Workbox | Google Developers
- Workbox Window | Workbox | Google Developers
- 神奇的 Workbox 3.0 | zoumiaojiang
- Migrate from Workbox v4 to v5 | Google Developers
- Namespace: workbox | Google Developers
Notification:
- bible-app/sw-installer.js | craigjennings11/bible-app | GitHub
- arnellebalane.com/main.mjs | arnellebalane/arnellebalane.com | GitHub
- hexo-service-worker/sw-register.tpl.js | zoumiaojiang/hexo-service-worker | GitHub
- hugo-theme-refine/service-worker.html | fredliang44/hugo-theme-refine | GitHub
- Workbox 4: Implementing refresh-to-update-version flow using the workbox-window module | Medium
- Lessons learned on offline capabilities with service workers using Workbox | Sam Vloeberghs
- hugo-theme-meme/service-worker.html | reuixiy/hugo-theme-meme | GitHub
- jeffposnick.github.io/_posts/_includes/register_service_worker.njk | GitHub
PWA:
来源:https://developers.google.com/web/tools/workbox/images/pwa.svg ↩︎
参考①:https://zh.wikipedia.org/wiki/渐进式网络应用程序
参考②:https://developer.mozilla.org/zh-CN/docs/Web/Progressive_web_apps ↩︎安利一个提供在线测试的网站:https://www.webpagetest.org/lighthouse ↩︎
https://www.webpagetest.org/result/191003_X2_834c7f82e1a525b190986e3ec91e2927/ ↩︎
静态网站生成器,Static Site Generator,简称 SSG。 ↩︎